Hippity Hoppity Easter’s on Its Way

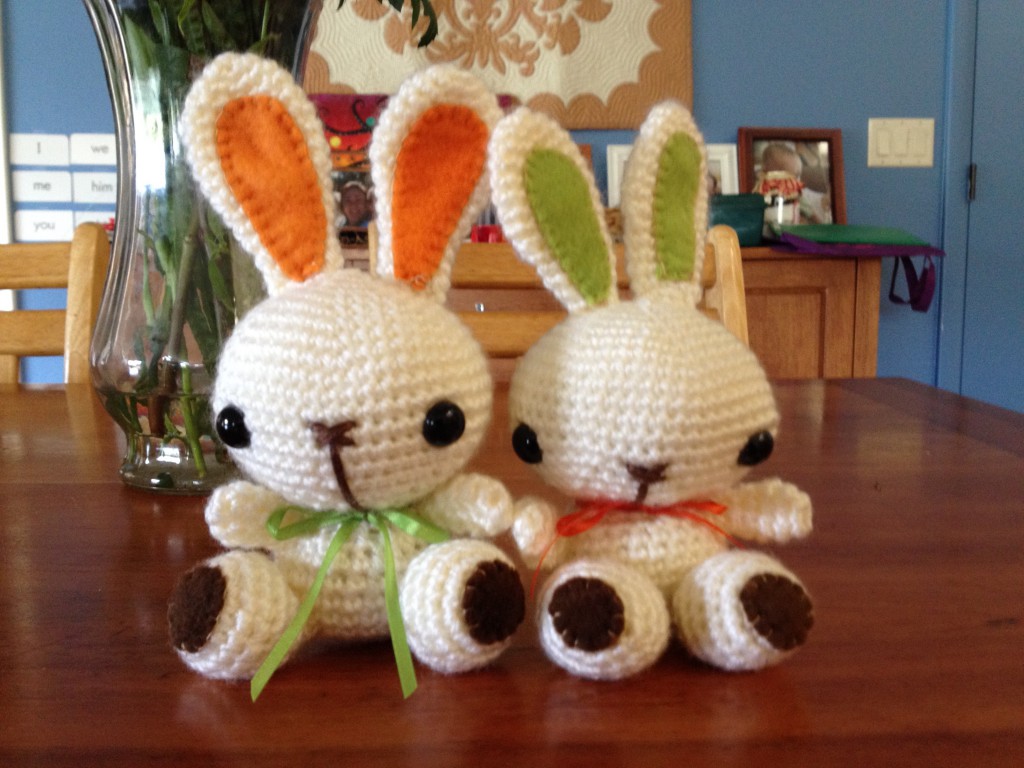
Easter bunnies

Easter bunnies to brighten up your Spring

Nothing says spring like a cute little bunny tucked into a child’s Easter basket. Since Easter is about 2 weeks away, I thought I would share this fabulous pattern for some sweet crochet bunnies.

These little guys will bring a smile to the face of any child thanks to this pattern by Stephanie at All About Ami – that’s “ami” as in amigurumi, the Japanese art of knit or crochet stuffed lovies. I didn’t include the carrot or the adorable flowers that are on Stephanie’s pattern because I was short on time. But these worked up really quickly, especially since I used some left over microfleece I had from another project and some simple matching ribbon. The beauty of the fleece is that it doesn’t unravel, so I didn’t have to worry about folding the edge before sewing on the ear and feet patches.

If you’ve never done amigurumi before, but you have some basic crochet skills, this pattern will be easy to follow. The instructions are super-detailed, and Stephanie provides wonderful pictures so you can follow along step-by-step.

Small Easter bunny

Closeup of the little bunny

I used the following materials:

  • 1 ball (5 oz.) Bernat Softee Baby in Antique White – it’s a lovely cream color and super soft
  • size E (3.5 mm) hook since I couldn’t find a smaller one.
  • Yarn needle for attaching the parts and hiding loose ends
  • Polyfill stuffing
  • Scrap microfleece – mine was actually patterned, but I cut out solid colored sections out of the pattern.  You really don’t need much, so if you have any scrap fabric, it will probably work just fine.
  • Needle & thread to sew on the fabric
  • 12 mm safety eyes – available at any craft store
  • Brown embroidery floss for the nose
  • Ribbon for the bow

Although I didn’t have the exact materials Stephanie used, these worked out great for me, and one ball of yarn was enough for two full bunnies with plenty left over for another one once I have the time. I made one a little smaller than the other since they were for kids of different ages.

My two bunnies went to a friend’s two little ones. They were visiting from out of town last year, and at ages 6 and 2, I wanted them to have a little something from us to take home. My friend was thrilled, and I hope these made their Easter extra special.

I hope you’ll try this adorable pattern. Or if you’re not a crocheter, pass it on to someone who is – maybe they’ll make you one to brighten your spring!


Read More

What Will You Do Today? Write a Will

legal will

Photo credit: Brian Turner on Flickr

March is Write-a-Will month, so although most people don’t like talking about it, now is a great time to think about planning for the inevitable.

As much as we hate to think about it, someday we’re all going to die. And for all the hard work we put into living our lives, I’d hate to think that all that would go to waste if something were to happen to me or my spouse. That’s where an estate plan comes in.

When my dad died, almost 8 years ago, my sisters and I had to figure out what to do. We walked through everything with my mom. We had an accountant and a lawyer to help answer questions, but we all still got thoroughly confused, especially since we were dealing with all this in the middle of our grief over losing our dad. But my dad was organized and had a good plan that fell into place whether we understood it or not.

These eight years later, I’m thankful that my parents had the foresight to put a plan into place. My husband and I have also been reviewing our plans and updating our wills to reflect how our wishes have evolved over the past few years. We will review every few years to make sure everything stays up-do-date, especially since circumstances sometimes change.

It’s Too Confusing! Or is it?

Having been through this process recently, I know from experience that these things can seem overwhelming and more than a little confusing, so let me simplify things a bit. Basically, estate planning involves making decisions about how you want your assets (house, bank account, personal property) to be used and distributed now and in the future, and putting those decisions down on paper.

This kind of planning also allows you to specify important things like who can make medical decisions for you if you get sick, who gets guardianship of your kids if they’re under 18, and what kind of funeral you’d like to have.

My good friend, Joe, is an amazing attorney with great skills at breaking down the confusion. I’ve referred several friends to his website to answer some basic questions, and they always feel well-informed when they’re done. Start by checking out his FAQs on estate planning here.

Attend a Workshop

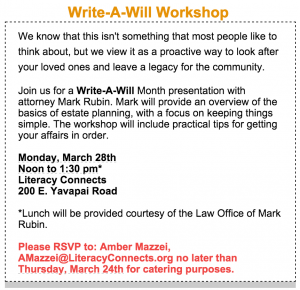
A good next step is to look in your community for a FREE Write-a-Will Workshop like this one in Tucson that is sponsored by Literacy Connects (RSVP to Amber at AMazzei@LiteracyConnects.org if you are in Tucson and want to attend). Check local non-profits, the public library or even your employer to see if they offer something like this.

Will writing workshop

I went to one of these free workshops at work a while back. I learned a ton, and they presented it in a way that was fun and engaging – not at all what I expected! It was the inspiration I needed to start my estate planning.

Look for Online Resources

If you can’t find a will-writing meeting like this in your area, take a look online. The Five Wishes, from Aging With Dignity walks you through end-of-life planning in a simple yet thoughtful way. This document focuses mainly on end-of-life care and many of the medical and spiritual decisions that surround it. The beauty of Five Wishes is that it meets all legal requirements for advanced directives in 42 states and Washington, DC. In the other 8 states, it can be attached to the state’s required forms. It’s a simple workbook that can be done on paper or online, and it only costs $5. It’s also a good tool to get you started with the rest of your estate planning.

Other online tools are available to help you write your will and set up your estate plan. Just be sure to check them out to be sure they’re legitimate and have a good reputation because there are also a lot of resources on the internet that are complete scams or that are not valid in all states or countries.

Ask a Friend

Sometimes our best resources are right in front of us. While most people don’t like to talk about this stuff, it’s likely that some of your friends or family members have already been through this process and can offer assistance or a good referral.

My husband and I both got referrals to great lawyers who have handled everything for us. We have separate estate plans because we married later in life, but we’re consciously coordinating them so that they will work together. Especially since we have kids, we need to make sure our wills say basically the same thing, so our attorneys and their experience and expertise are invaluable.

Of course, the cost to use a lawyer will be higher than if you do something yourself. But if you think about it, the cost will be much higher if you don’t do it or if you do it wrong. The taxes, alone, could take a significant portion of your assets away from your loved ones, so the upfront cost of a good lawyer is well worth the expense.

We’ve also had so many questions throughout this process that I can’t imagine trying to do it myself. The nuances of writing a will so that it reflects exactly what you want is complicated, and a good attorney, with the experience and know-how to guide you, can help you feel comfortable that your wishes will be expressed clearly.

Share Your Plans with Loved Ones

comfort hug

Photo credit: B Wendell Jones on Flickr

Once your planning is done, be sure to share your plans with your loved ones, especially those who will have some role in carrying out your wishes once you’ve passed on. If this makes you uncomfortable, at least let them know that you have a plan and how they can access it if they need to (your attorney’s name, where in the file cabinet it is, etc.). Because NOT telling someone is almost as useless as not having a plan at all.

I know it seems like you have plenty of time to do this kind of planning, so it’s an easy thing to put off until later. But you never know what life has planned. I met my husband after his first wife was killed in a car accident. My 28-year-old niece woke up one morning, and her fiance had died in his sleep. And my friend lost her husband after a hard-fought battle with cancer, leaving her to care for their 3-year-old daughter alone.

You just never know, so do it now.

Read More

Toilet Paper Roll Art Actually Worth Keeping

Toilet Paper Roll Art

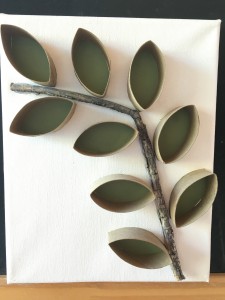
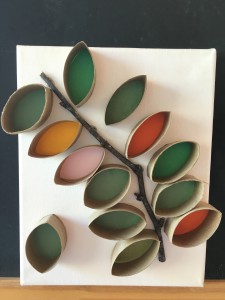
Not your average toilet paper roll art

Spring break is approaching, and all the horrors joys of having the kids home ALL DAY with it. What to do? What to do? Art project!

No, I haven’t lost my mind and I don’t hate you. Trust me. This one is easy and only requires a little bit of advanced prep. I even did this with my son’s Pre-K class – 16 kids at once – and I’m still alive.

Ok, You’ve Convinced Me. Now What?

This is not rocket science. Seriously, this is all stuff I did with the TV on a few days ahead of time. It’s not a high concentration activity, and the kids can help.

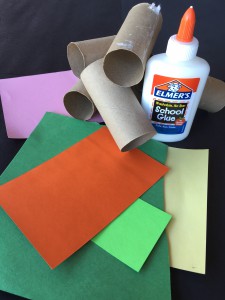
Prep this stuff ahead of time:

  • toilet paper rolls (remove the toilet paper first) – you’ll use about 2 per kid
  • scissors or a paper cutter
  • colored paper (mostly green but other leafy colors will work, too)
  • white glue
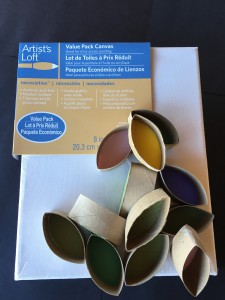
Art supplies

Simple materials make this easy

Cut the toilet paper rolls into ½”-¾” sections so you have a bunch of little rings. It’s okay for them to be pointy on the ends; you want them to look like leaves. Just smush the tubes lengthwise and cut. I used a paper cutter, but scissors will work just fine.

Take your little rings and use some plain white glue around the edges to stick them to the colored paper. Let them dry completely. Then cut around each ring, so you now have a bunch of “leaves” with a colored backing. Set these aside for craft day.

Today’s the Day!

Here’s what you’ll need to create your art piece:

  • small canvases (I buy the value packs of canvas at Michael’s & it usually works out to be about $1 per canvas). You could also use cardboard, foamcore, wood or any other stiff backing – use whatever floats your boat or whatever is easiest to get ahold of.
  • your toilet paper roll leaves
  • small sticks – we used sticks we found in the yard, but if you don’t have cooperative trees, pipe cleaners or other stick-like materials will work
  • More art supplies

    Ready to create

    hot glue gun to attach the sticks to the canvas – this is the only part the kids can’t do

  • white glue

Send the kids outside to gather sticks – one per canvas. Now go have a cup of coffee, they’re going to be a while. Score one for mom!

When the kids return, pick the sticks that will work and hot glue them to the canvas. Then stick the toilet paper roll leaves on around the stick to look like leaves. My method is to pour a little white glue into a shallow dish (a paper plate works well), then take a small paintbrush and brush the paint onto the back of the leaf and stick it to the canvas. Press it down gently and it should stick. Pressing up from the backside of the canvas will help, too.

IMG_2614

My son’s creation – I love how the leaves reach off the canvas and how one is falling!

Once all the leaves you want are attached, let them dry then hang your masterpiece. My sample and the one my son did in Kindergarten hang in our kitchen, and I always get compliments on them when people come over.

If you’re not into leaves, we also made flowers and butterflies in class using pipe cleaners instead of sticks (perhaps some of my lovely readers will share their kid’s masterpiece from class last year – hint, hint!). If it’s fall break instead of spring, try using gold, orange and red paper for your backing. Be creative, and if you do this craft or have other ideas, please share. I’d love to see how yours turn out!

Bonus: these make great homemade gifts. So if your kid was in my kid’s class last year, and you already have one of these in your house, take note! Think grandparents … Mother’s Day, Father’s Day, birthdays, or whatever occasions you have coming up. Homemade art from the kids is always a hit!


Read More

I Went to the Gym Today … Yay Me!

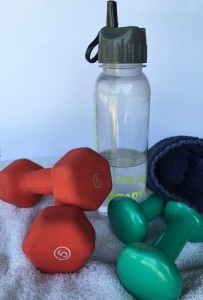
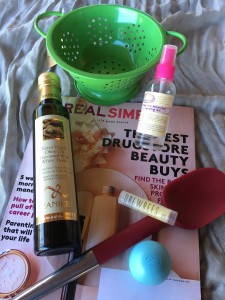
My workout paraphernalia

My workout paraphernalia

“Exercise is a critical part of a healthy lifestyle.” So says every expert and guru out there. And of course, we all know it’s true.

But as moms, we also know it can be incredibly hard to do. And being a stay-at-home mom hasn’t made it any easier. Just because I actually have time during the day, doesn’t mean I actually have time during the day. Because I’m running errands or doing laundry or doing my volunteer work. Or maybe I’m just tired or my kid is home sick or I’d just rather watch Scandal today instead of getting workout ugly* trying to balance on my elbows in yoga class.

But today I went to the gym. Admittedly, I haven’t been in a while, and I didn’t do the yoga class (I didn’t feel I could face the perky

teacher – I really love her too much to inflict myself on her class today). I managed a respectable 40 minute, 2+ mile jaunt on the elliptical. Enough to feel like I did something, but not enough to require serious rehabilitation time afterwards.

It felt good. It didn’t kill me, and I know I did something healthy for myself. I may even do it again tomorrow. Yay me!

IMG_2602

My actual feet in my actual shoes after my actual workout!

Now to stay  motivated. How do you do it moms? Please share what works for you! I’d love to hear what strategies you use. Perhaps it will get me off my butt and into the gym a little more. And perhaps I’ll see you there.

*workout ugly (adj.): the red-faced, hair-falling-down, sweaty mess that is me during and after a workout. I do NOT “glow,” “shine,” or in any way look good when I work out. If you do, I’m not sure we can be friends. Or at least not workout buddies. Sorry.


Read More

Crochet Project – Quick & Easy Scarf

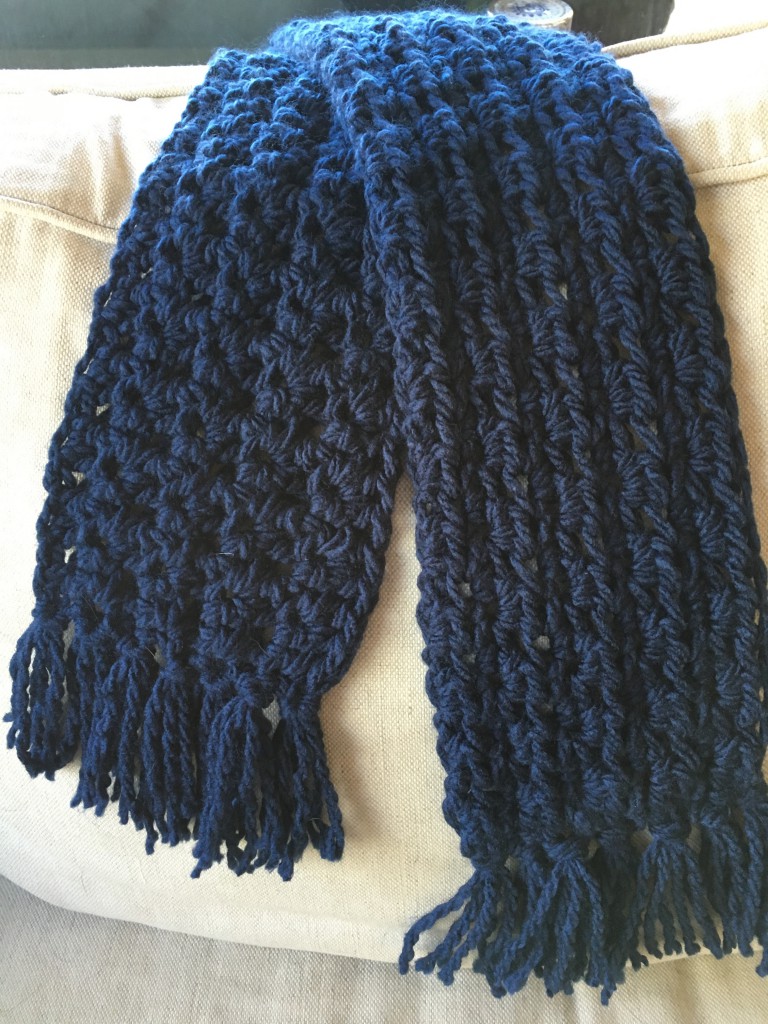
Crochet scarf with fringe

The finished product – this one with fringe

Crochet … it’s not just for old ladies anymore! I admit, I used to see my grandmother, my mom and my aunts crocheting, and I would think to myself that this is an old lady craft. But I’ve come to realize that crochet is fun and artistic, and it has become an avenue for me to express my creativity, personalize gift giving and relax.

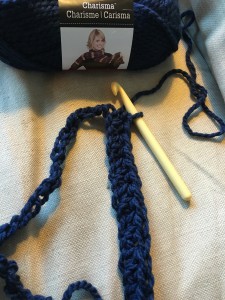
Quick to crochet

Once the yarn is on the hook, this pattern works up quickly

Warm and Cozy

One of my favorite patterns is the Fantastic Fall Scarf from Rescued Paw Designs. Krista has created a beautiful design that works up fast. And unlike some patterns, it doesn’t feel tedious while you’re working. The soft Charisma yarn feels wonderfully warm and cozy, and the scarf’s simplicity makes it perfect for everyday. Of course you could use whatever yarn floats your boat, but I found this one to be just right.

I ended up adding some fringe on the ends of some of the scarves I made from this pattern, just to add a little interest. I love it both ways, though, and it’s versatile enough that it looks great either way.

Great Gift

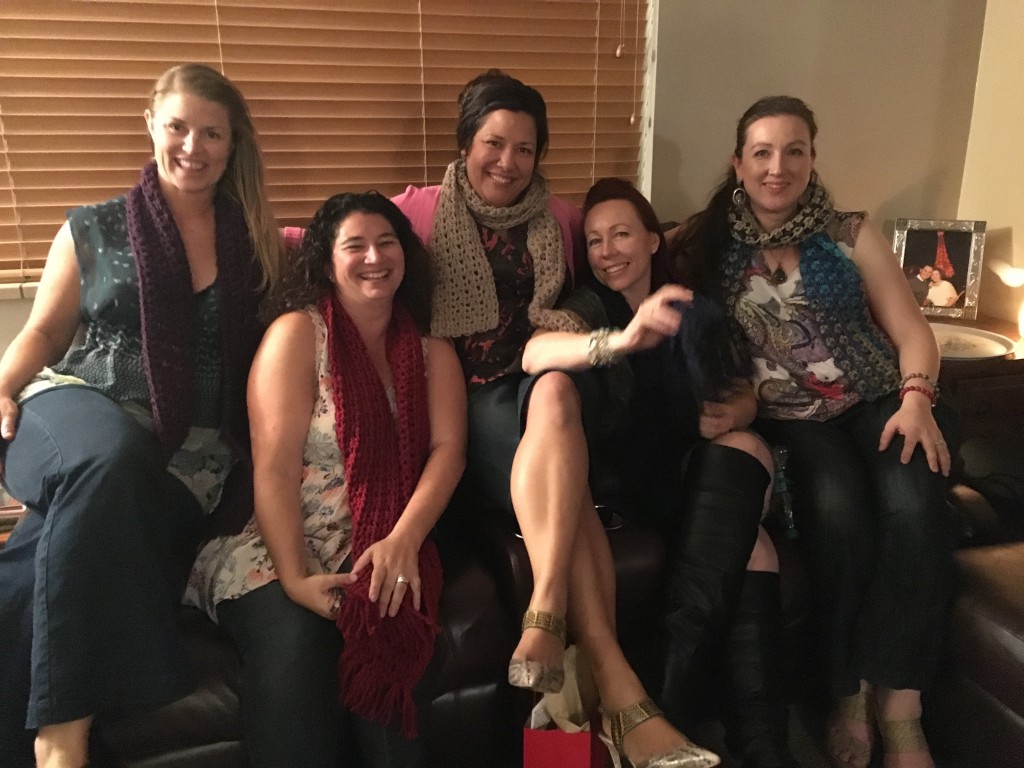
If you read this blog, you’ll know that the Favorite Things Party I have with my friends is an amazing good time. This year, I was so happy to give these scarves as my favorite things. The ladies who received them were thrilled, and even though it’s already warm enough to wear shorts here, they didn’t take them off for the rest of the evening. Don’t they look great in them?

If you crochet, this pattern is a must. For a beautiful, soft, warm and versatile scarf, this one can’t be beat!


IMG_2593

My 5 lovely friends rocking their new scarves at our Favorite Things Party

Read More

Friends, Food and Favorite Things

IMG_2595

What’s better than great food and quality time with friends? A Favorite Things Party, of course!

What’s a Favorite Things Party? Only the most awesome, fun and fabulous time ever. My friends and I have been doing this every year for the past 4 years, and it’s the one party that everyone tries their best NOT to miss.

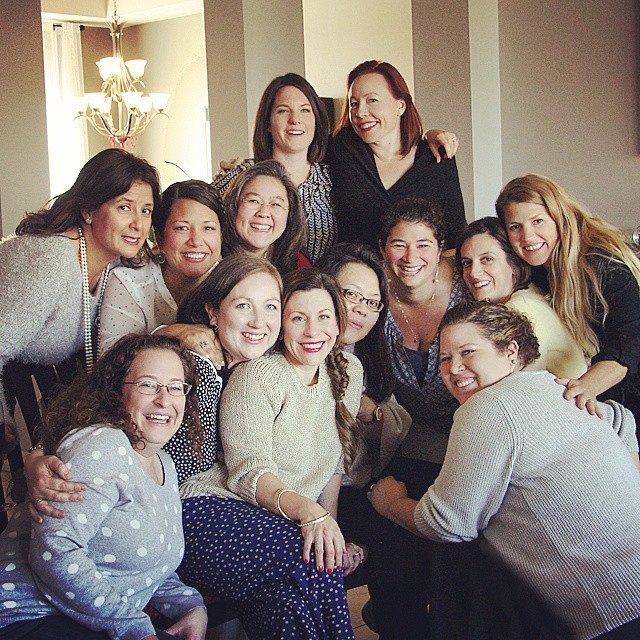
I don’t think I would have survived the past 7 years without my mommy group. We affectionately call ourselves the Mamafia because we can be a fierce force to be reckoned with whenever one of us needs support. We’ve been friends since our kids were babies, and as the kids have grown, so has our friendship.

Our kids are now in different schools and have different friends, but we still try to get together whenever we can. We have Mom’s Night Out as often as our schedules will allow – once a month if we’re lucky – and we have our Favorite Things Party.

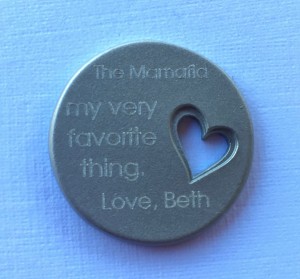
Beth loves us!

Beth loves us!

We tried it one year in place of a holiday gift exchange and now it’s a yearly tradition. This year we waited until February because our holiday schedules were all so crazy, but no matter what time of year it is, it’s a blast.

5 Things for $5

If you’ve never heard of a Favorite Things Party, let me explain how it works. Instead of bringing one item for a gift exchange, you pick one thing that is actually one of your favorite things – something you can’t live without, something you probably use every day. So you pick one thing that costs $5 or less and buy 5 of them. Of course, you can set the dollar limit anywhere you’re comfortable, but we like to keep it as simple as possible. You’d be surprised at how many inexpensive things are indispensable in our lives!

So everyone arrives at the party with their 5 things under $5, and each person puts their name in the draw basket 5 times. Meanwhile, everyone also brings a favorite dish to share, and we eat fabulous food until we’re ready to pop.

Time for the Presents

When everyone’s fed and happy, it’s time for the gift exchange! Pull out the basket with all the names in it and pick someone to go first. That person gets to explain why their item is one of their favorite things, and they should feel free to be as descriptive or mysterious as they like. Then they draw 5 names out of the basket, and those 5 people get that person’s gift. It’s so much fun to hear about why something is a favorite, and it helps us all get to know each other a little better. Everyone goes home with 5 new things and some wonderful stories.

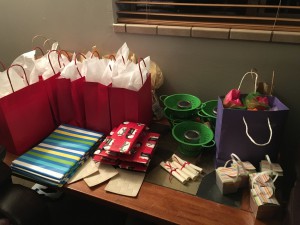
All wrapped up and ready

All wrapped up and ready

The favorite things are fabulous, too! Things that we each might take for granted in our daily lives start to mean more once we share them. And these are things that are truly useful and meaningful rather than the knick-knacks and other random items you might get at a typical group gift exchange or white elephant party.

We’ve had favorite magazines, cool lipsticks, lotions & body butters, all kinds of delicious food and snacks, even a can of WD-40 because it is truly something one of us cannot live without! These ordinary items take on special meaning because they’re special to one of our friends. And we can take them home, use them, think of our friends every day, and perhaps that item will also become one of our favorite things.

A Fun Tradition

A few of our favorite things

A few of our favorite things

I think what make the Favorite Things Party so great is that it’s so simple. And it never gets old or stale because we all discover new favorite things every year. It’s so much fun that my family traded our Christmas adult gift exchange for Favorite Things, and everyone loved it. Now we don’t go overboard with gifts, and we have a fun new tradition that the whole family can enjoy as much as my friends and I do.

If you’re looking for something fun to do with friends or family, I hope you’ll try a Favorite Things Party, too!

Favorite Things Party with my Favorite Mama Friends

Favorite Things Party with my Favorite Mama Friends


Read More

Dinner Under 30 – Easy Salmon & Couscous

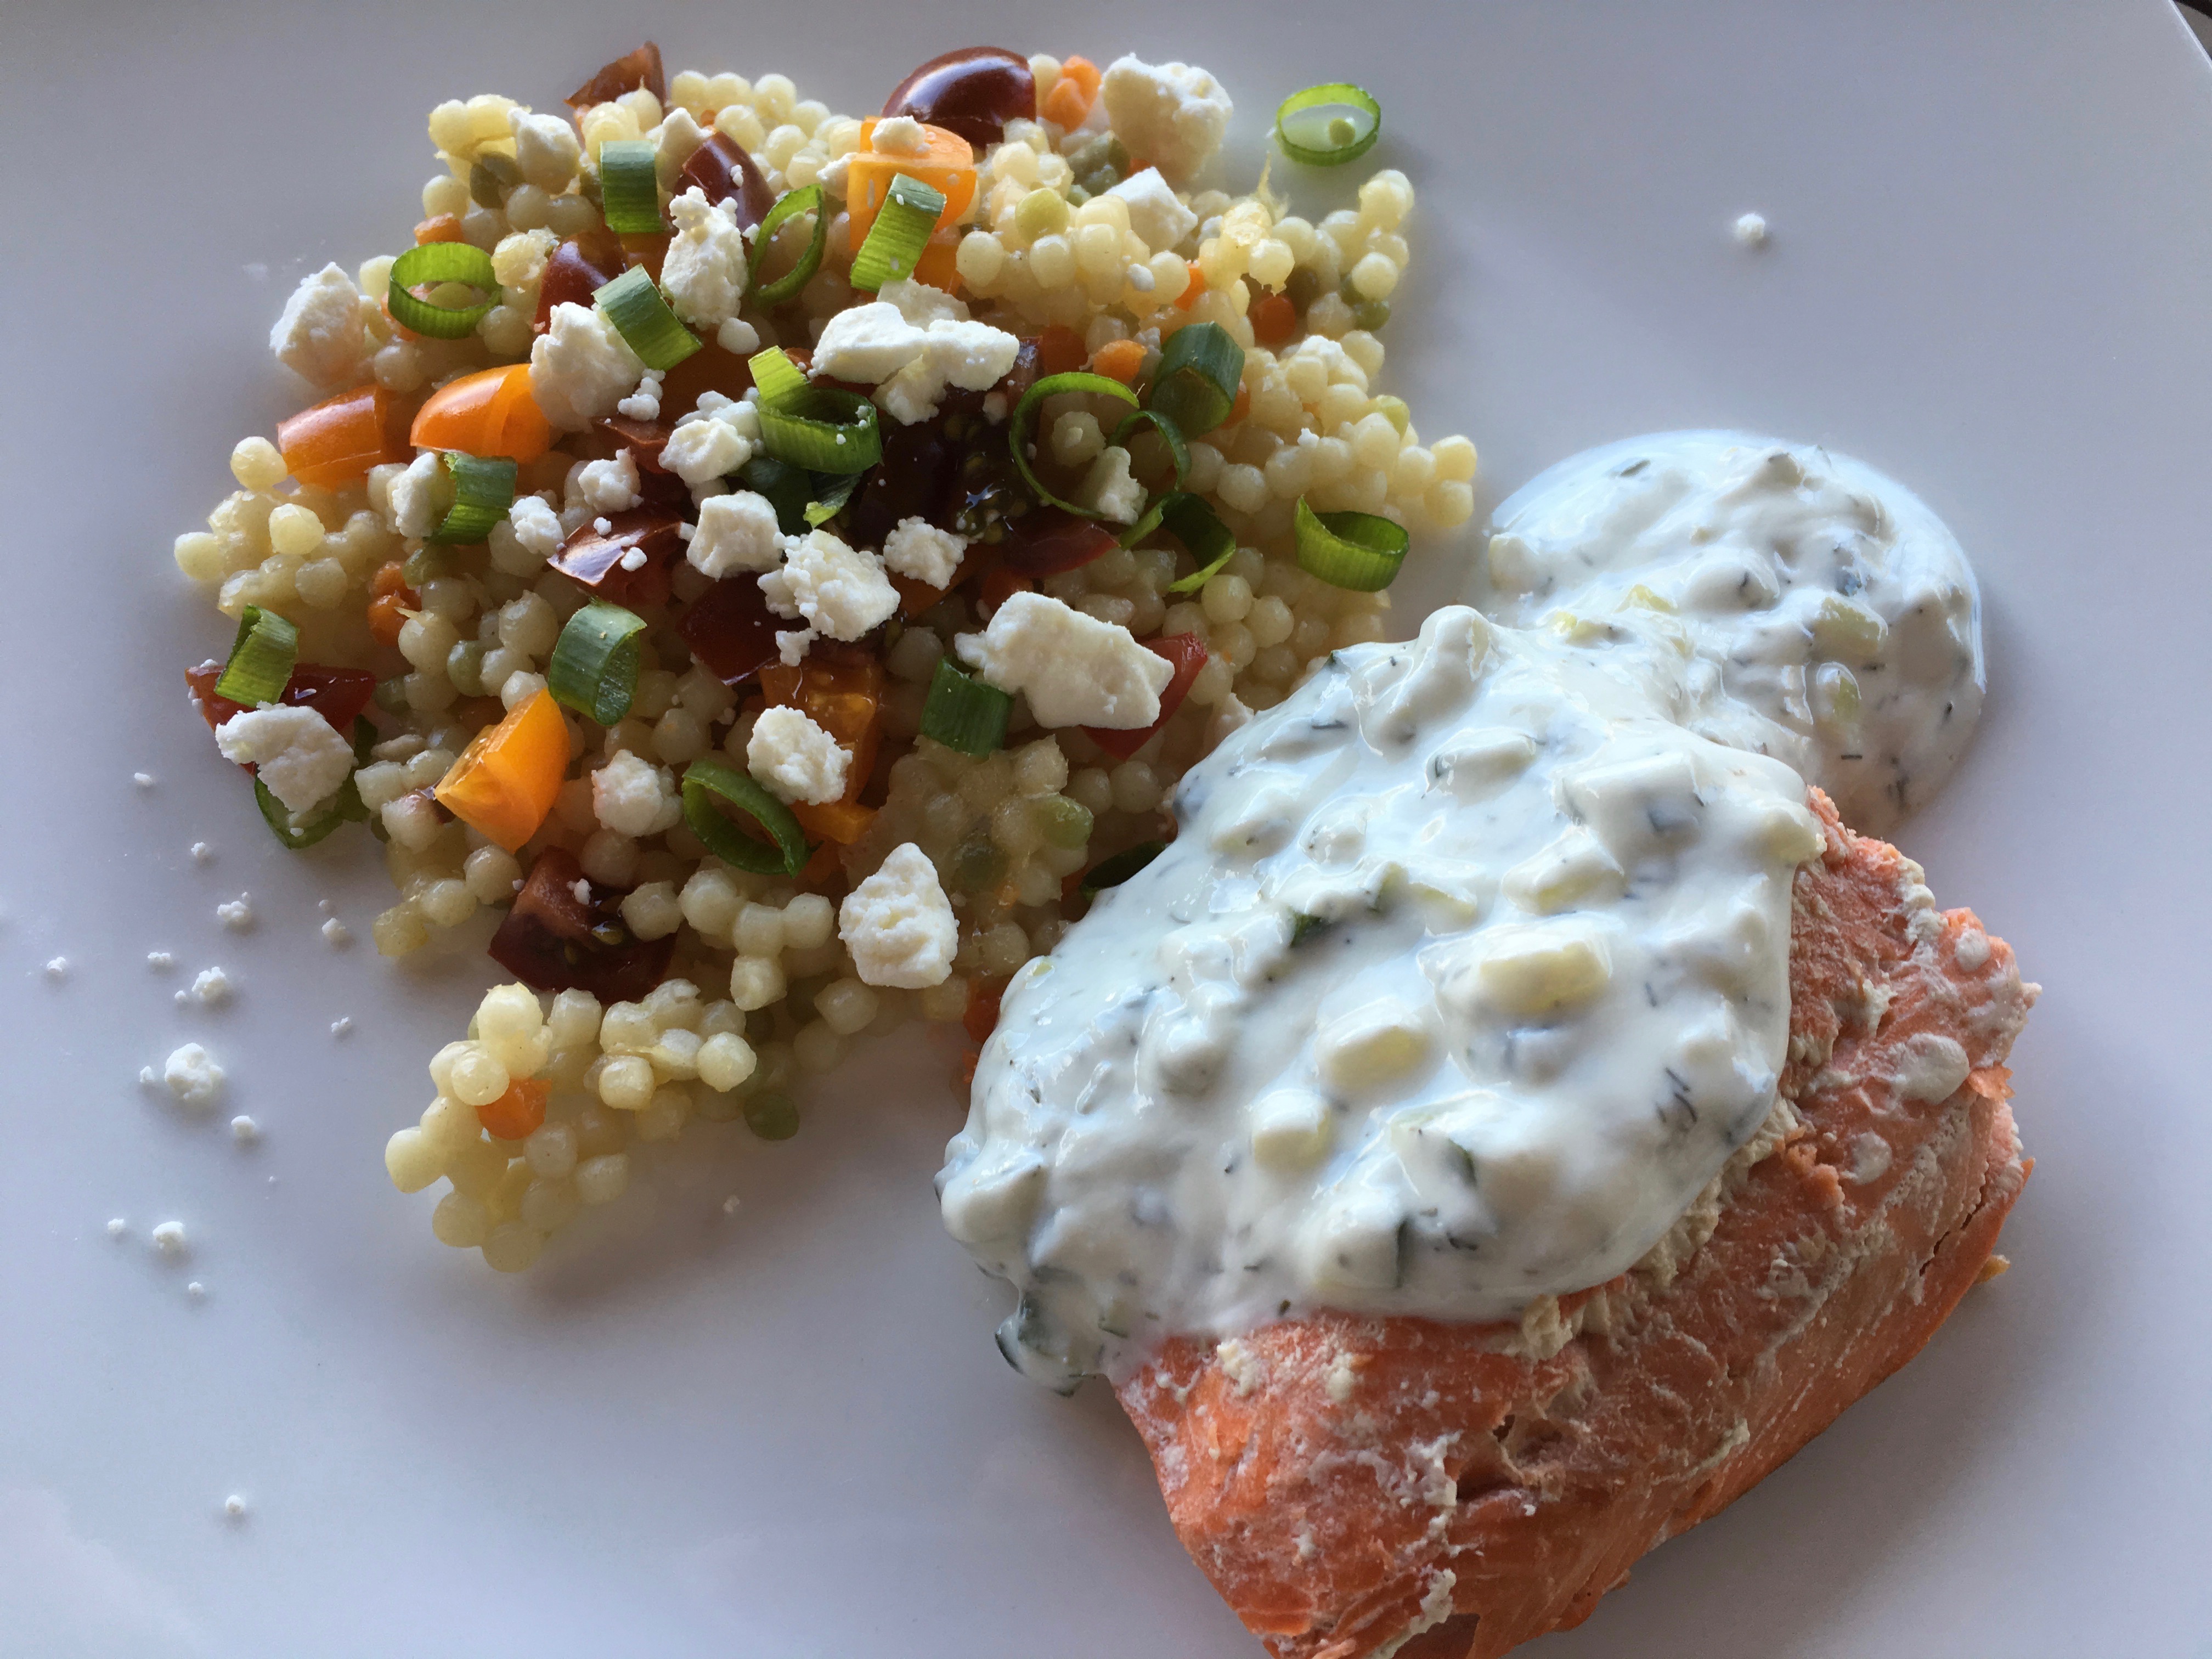
Delicious and pretty

Delicious and pretty


Every week, our house seems to get busier and busier. Between swim practice, soccer practice, Girl Scouts, gymnastics and music lessons, sometimes it’s hard to know who’s coming and going much less what’s for dinner. In this new series, Dinner Under 30, I’ll share some delicious meals that you can have on your table in 30 minutes or less.

Keep in mind, I’m not an expert. In fact, I struggle every day with shopping, planning and making tasty, healthy meals that my family will actually eat. Our weeknights are cram-packed with activities, but we have a commitment to eat dinner together unless it’s absolutely impossible to do so.

Plan Ahead, Keep it Simple & Be Creative

The key to successful, quick dinner is to plan ahead. If you can, take a look at your recipes before you go shopping and make sure you have what you need. Of course, if  you’re human, like me, there will always be something you forget or that you thought you had but you don’t.

That’s where keeping it simple comes in. The simpler the recipe, the easier it is to substitute ingredients if necessary. Something in your pantry might work in place of something you forgot, like a can of diced tomatoes might work if you forgot to put the fresh tomatoes in the basket.

And don’t be afraid to improvise! Being creative in the kitchen can be fun, and sometimes you’ll come out with something better than what you planned in the first place. My friend, Beth, has elevated this to an art form in her blog, One Missing Ingredient, where she tells a great story, then chronicles her successful substitutions and the delicious outcomes. (Go visit her; you won’t be sorry!)

Poached Salmon with Cucumber Dill Sauce and Couscous

So, enough of the background. It’s time to eat! And this recipe is one of my favorite quick and easy meals. It’s healthy, filling, tastes great and looks pretty on a plate.

Wild caught salmon stars in this dish, and while you can get it already cut into individual portions, I find that a big filet is easier to find (and a little cheaper, too). I just cut it up before I serve it, and nobody knows the difference.

IMG_2585

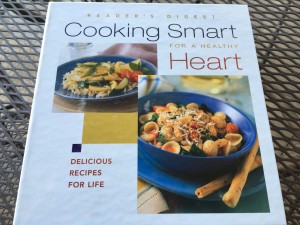
I’ve had the recipe for years. It’s from a monthly recipe card series I got from Reader’s Digest called Cooking Smart for a Healthy Heart. Each month, when the cards arrived in the mail, I would faithfully put the recipe cards into the binder they gave me until I accumulated a whole cookbook. I’ve used a bunch of these recipes, but this Poached Salmon is one I keep coming back to. The couscous is our side-dish of choice, and it’s so simple it doesn’t come from any recipe book. Serve it with a simple salad or quick steamed broccoli or green beans and you’ve got a full meal!

For the couscous:

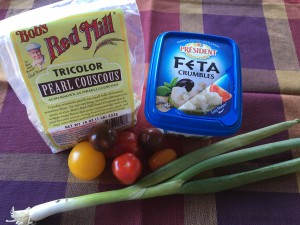
2 cups couscous (my kids like the Israeli or Pearl couscous, but you could use anything)

Diced, fresh tomatoes

Green onions, thinly sliced

Remember to take the picture before you cook the couscous!

Remember to take the picture before you cook the couscous!

Feta cheese, crumbled

Start the couscous first, and cook according to package directions using chicken broth or vegetable broth instead of water for a richer flavor. This usually takes about 10 minutes to cook. Once cooked, remove from heat and fluff it with a fork. Once cooled, serve with tomatoes, green onions and feta sprinkled over the top.

For the salmon:

1 lb Wild Caught Salmon filets

1 1/2 cups water

1 cup dry white wine or chicken broth (I usually use a combination of both)

2 green onions, sliced

8 black peppercorns (I don’t count – I just shake out a small handful)

Using a large nonstick skillet, pour in the water, then stir in the wine/broth, green onions and peppercorns. Place the salmon in the skillet, skin down (if it has skin), in a single layer. Bring to a boil over high heat. Reduce heat to medium low, cover and simmer for 5-8 minutes, until fish flakes with a fork.

For the sauce:

3/4 cup Greek yogurt or sour cream (these are both great, but I prefer the yogurt)

1/3 cup finely diced cucumber

2 Tbs dill

1 Tbs fresh lemon juice (or to taste)

1 tsp salt (or to taste)

While the salmon & couscous cook, stir together the yogurt, cucumber, dill, lemon juice and salt in a small bowl. Set aside until it’s time to eat!

Once everything is ready, serve it up! Our kids have different opinions of the sauce and the couscous toppings, so we plate each person’s individually and let them spoon the sauce on themselves. But it IS a meal that they all eat, even my picky, fish-hater. And in 30 minutes or less, this is a perfect mid-week meal.

What do you think of Dinner Under 30? Let me know what you think, especially if you try the recipe! What else would you like to see here? Use the comments to send me your thoughts, ideas and questions. Thanks!


Read More