Blueberry Pastry Dream: the Perfect Summer Dessert

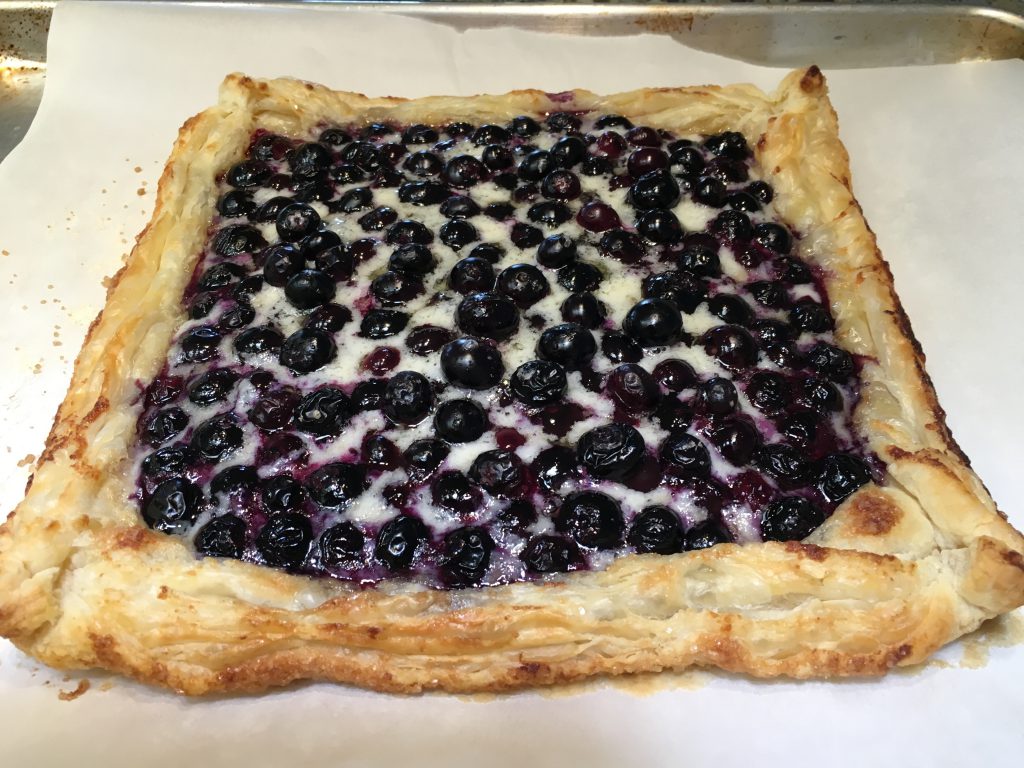
Blueberry pastry

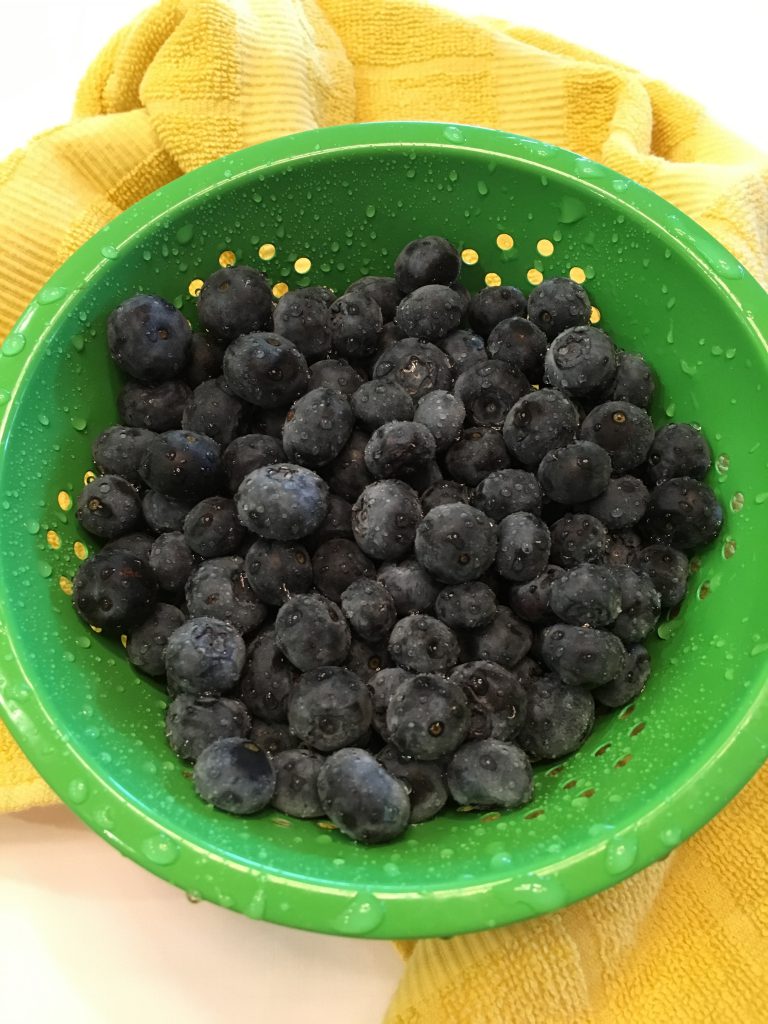
Beautiful blueberries for my Blueberry Pastry Dream


Blueberries went on sale last week. I mean a serious sale. I bought my beauties for under $1 per pint. But even better … they were Buy 1, Get 2 FREE! Yes, you read that right. I even had to check with the cashier to make sure I had read the sign correctly, but I did, and I merrily went home with 3 pints of blueberries ready to be loved.

What to do with these luscious, plump little berries? I put them in cereal, made a couple of fruit mixes, and of course, popped them in my mouth right out of the package. But 3 pints is a lot of berries, so I had to get creative. Not wanting to make too much work for myself, I looked around to see what I had or what I could get pretty easily.


Blueberry Pastry Dream is Born

We just came back from vacation in Oregon. And while we ate lots of summer fruits, surprisingly blueberries didn’t make it into our rental kitchen. But, my husband bought a lovely blueberry pastry at the coffee shop in the airport on our way home, and it looked delicious. So I began to think about how I could create something similar without a lot of work.

In the deli drawer of my refrigerator, I found a tub of mascarpone cheese. Apparently we made something with it recently (I can’t remember what) because it was half-empty. But that was just the thing I needed to make the blueberry pastry dream a reality.

If you’ve never used mascarpone, this would be a lovely way to try it. It’s a soft Italian cheese product that’s more creamy than cheesy. It stirs up like a whipped cream cheese might, but it has a milder flavor and smoother texture. It makes desserts like tiramisu irresistible and pasta or risotto dishes creamy and decadent. You can find it with the specialty cheeses in your regular grocery store.

I used the mascarpone as the pastry filling, to give the blueberries a foundation on which to float their berry goodness. Then I put it all in a convenient store-bought sheet of puff pastry and baked it. It turned out simply divine with just the right amount of sweet and tart on flaky, buttery pastry shell.


Putting It All Together

The step by step process was super simple. Here’s how I did it:


Blueberry pastry filling

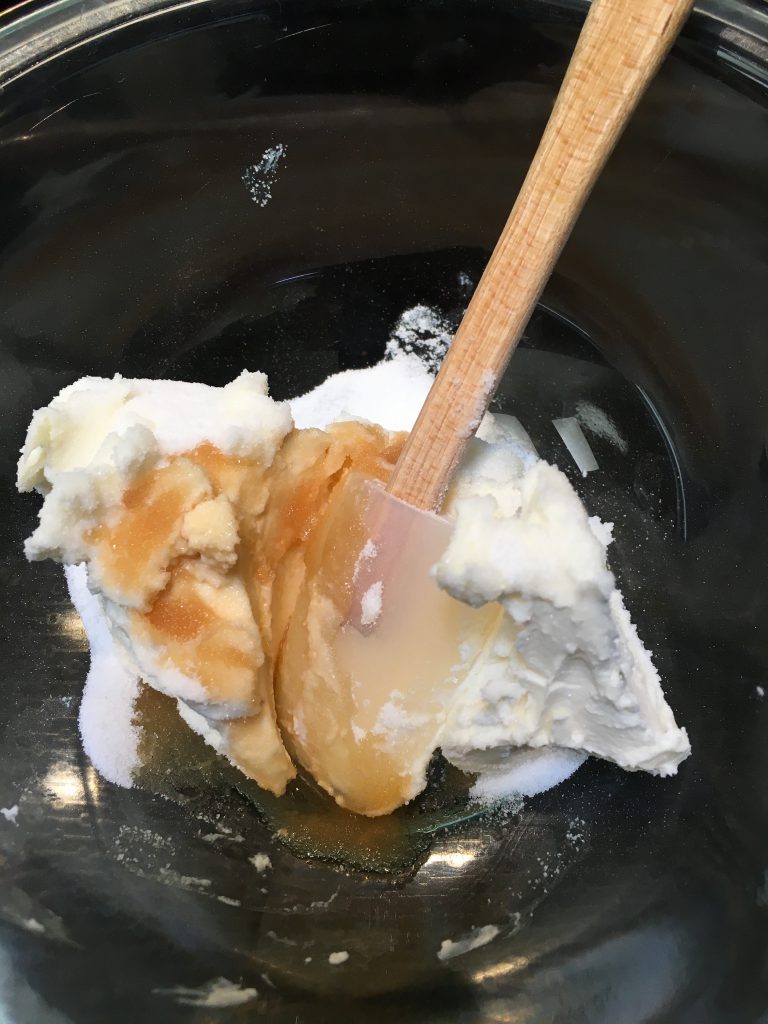
Stir together 4 ounces of mascarpone cheese with some sugar and vanilla. This will be your pastry filling.


Blueberry pastry crust

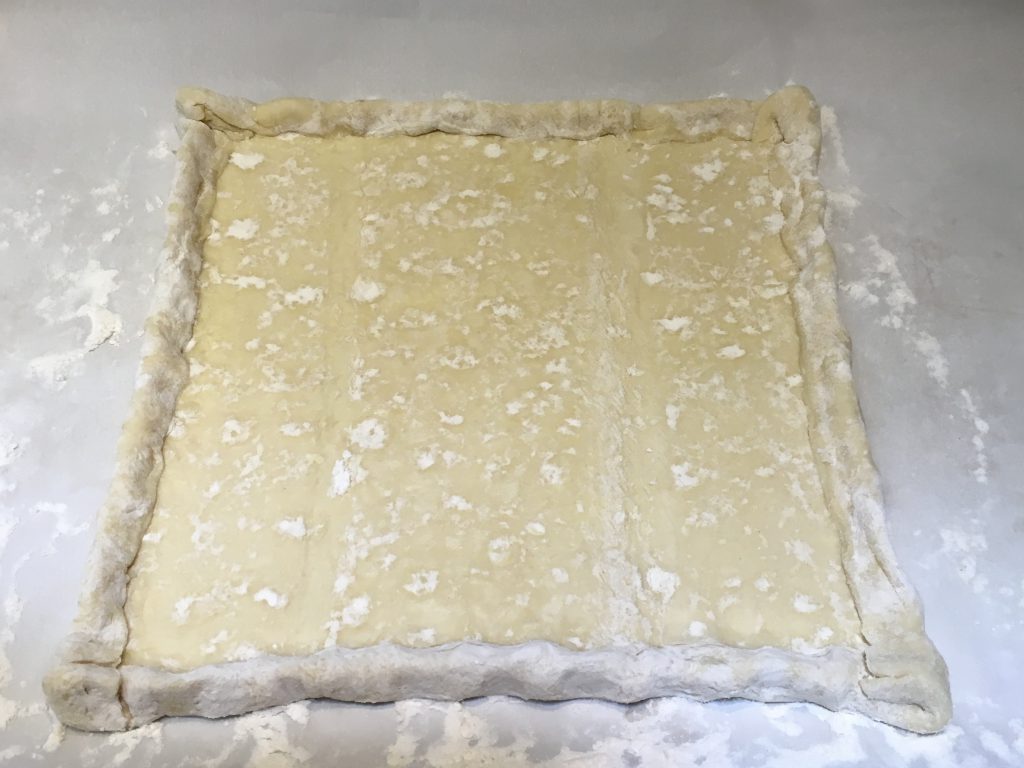
Take one sheet of thawed puff pastry dough (in the frozen section of the grocery store), and fold the edges in to make a little wall. This will hold all of the blueberries and filling in the pastry.


Spread filling for the blueberry pastry

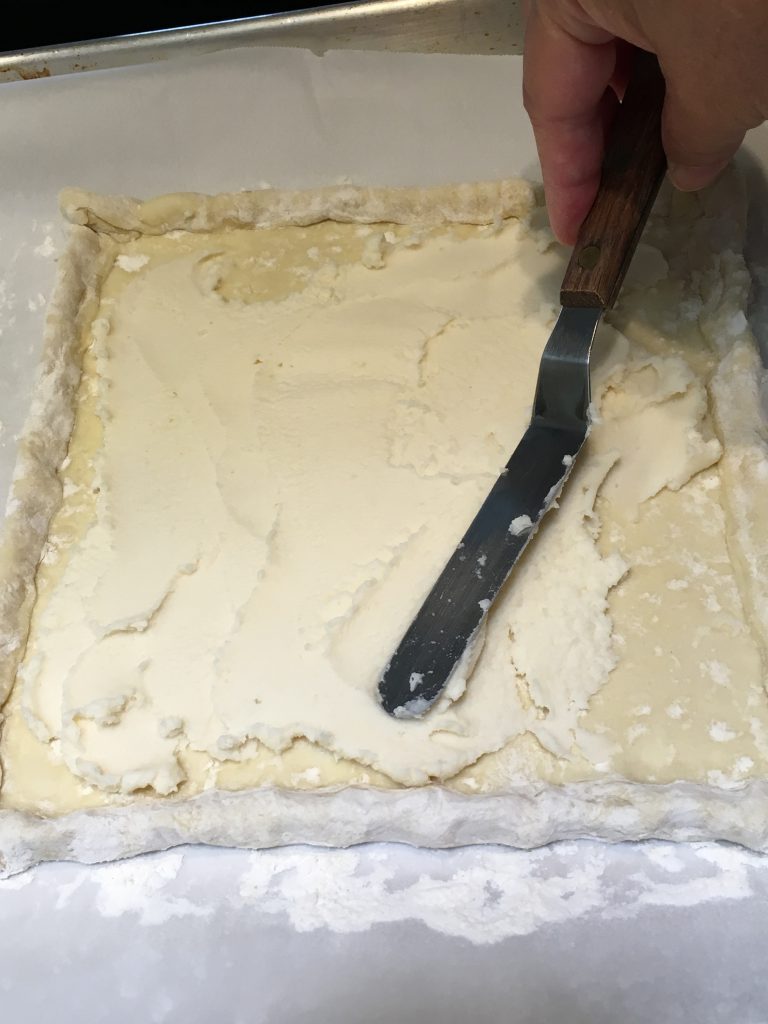
Spread your mascarpone filling in the prepared pastry shell. There should be enough for a thin layer to reach all the way to the walls you made in your pastry shell.


Blueberry pastry ready for the oven

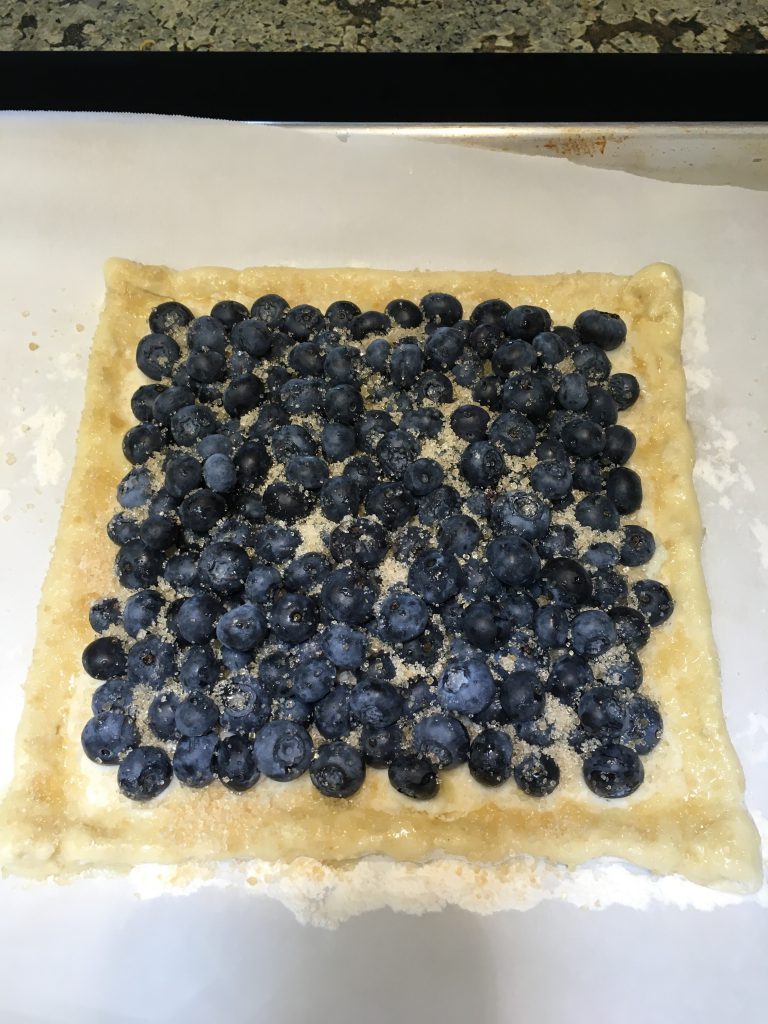
Layer one pint of blueberries on top of your filling and inside the pastry walls. Brush the walls with a little melted butter and sprinkle the whole thing with some coarse sugar. Then pop it in the oven and let the magic happen!


What comes out will be a lovely Blueberry Pastry Dream with a crisp, flaky outer crust and a mildly sweet center. What could be better than that?

Blueberry pastry dream

Here’s the printable recipe. I hope you enjoy!


Print Recipe
Blueberry Pastry Dream
A lovely dessert or brunch item featuring plump summer blueberries.
Blueberry Pastry Dream
Course Dessert
Prep Time 10 minutes
Cook Time 20 minutes
Servings
Ingredients
Course Dessert
Prep Time 10 minutes
Cook Time 20 minutes
Servings
Ingredients
Blueberry Pastry Dream
Instructions
  1. Thaw frozen puff pastry shell according to package directions.
  2. Pre-heat oven to 400 degrees F.
  3. In a small bowl, mix mascarpone cheese with granulated sugar and vanilla. Start with a small amount of sugar. Give it a taste and add more if you like it sweeter. I used about 1 1/2 tablespoons.
  4. Place thawed puff pastry sheet on a lightly floured parchment paper on a baking pan.
  5. Fold in edges of pastry to make a little wall. Be sure all edges are firmly stuck together.
  6. Spread mascarpone mixture in a thin layer in the center of the puff pastry shell. Feel free to take the filling all the way to the inner edge of the pastry walls.
  7. Layer 1 pint of blueberries on top of the mascarpone filling.
  8. Melt 1 tablespoon butter and brush around the edge of the pastry (on the folded wall).
  9. Sprinkle coarse sugar over the top of the blueberries and around the edge of the pastry. This will give the crust an added crunch. If you don't have coarse sugar, you can skip this step or try a sprinkle of regular sugar.
  10. Bake for 20 minutes or until the crust is puffed and golden brown.
  11. Once cooled, remove pastry from parchment and onto a serving dish or platter. Serve as is or add a dusting of powdered sugar to make it look pretty.
  12. Enjoy!
Share this Recipe
Read More

An Olympics-Worthy Snack for Rio 2016

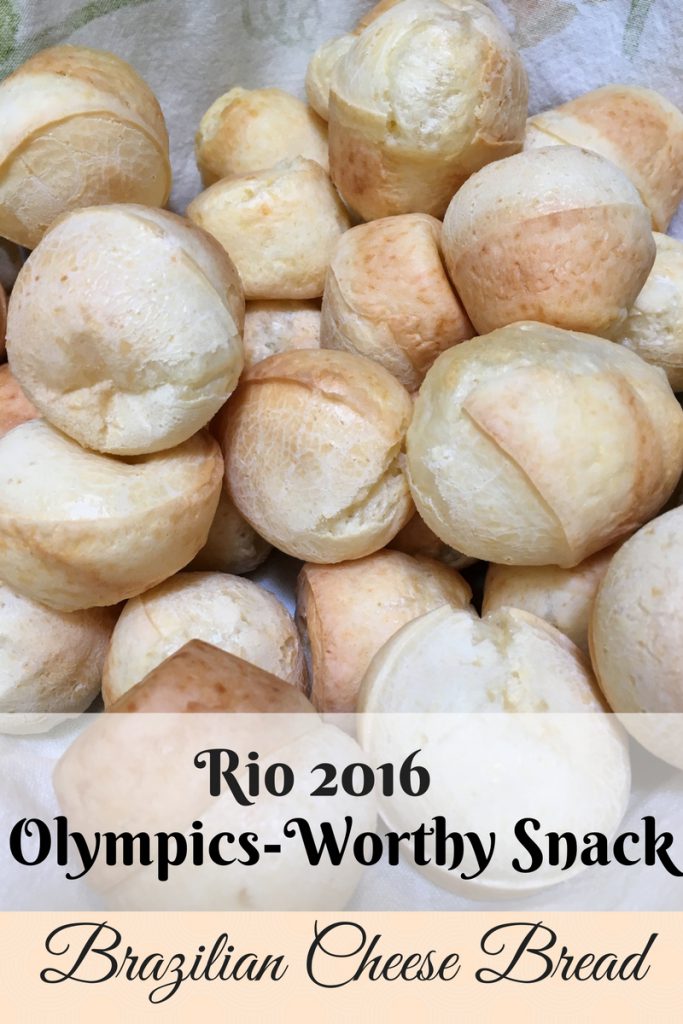
Olympics-worthy snack


The Rio 2016 Olympics start tonight, so we all need an Olympics-worthy snack to enjoy as the games begin! I grew up watching the Olympics, and I still look forward to the games every two years. From the pomp and pageantry of the opening ceremonies to the proud moments watching our athletes stand on the medal podium, I find myself riveted to the TV. So, of course, all this TV watching requires a good snack. (Click the link for the the full Rio 2016 Olympics viewing schedule.)


Why is Brazilian Cheese Bread Olympics-Worthy?


In honor of the Olympics being in Rio de Janiero (and because I’m using a new recipe plugin now), I thought it was worth re-visiting my Brazilian Cheese Bread recipe. After all, the Olympics are in Brazil, and at least in my world, you can’t have too much Brazilian Cheese Bread!

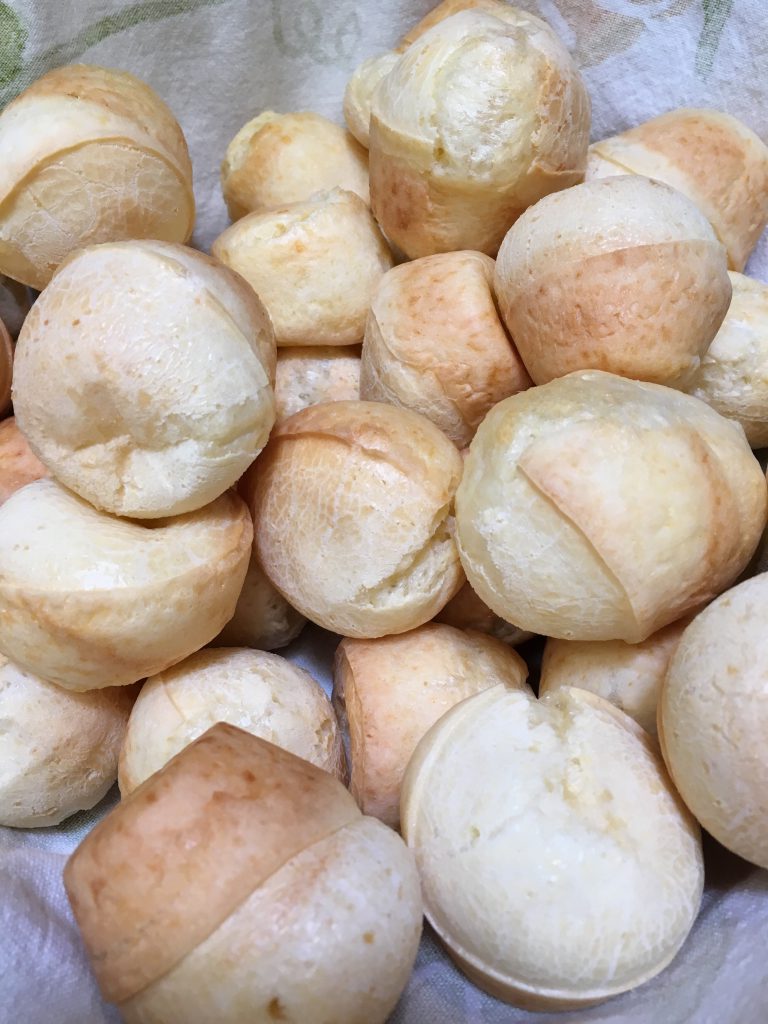
The best part about Brazilian Cheese Bread – or cheesy bread as the kids call it – is that it’s actually healthy and easy to make. All the ingredients get thrown together in the blender, whirred around until you have a smooth batter, then poured into mini muffin tins. That means you only have one appliance to clean – awesome!

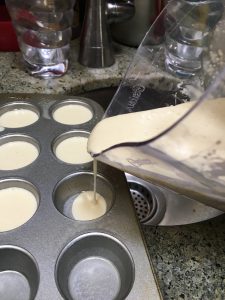
Brazilian Cheese bread in muffin tin

Pour the batter into well-greased mini muffin tins

These little bites are also gluten free since they use tapioca flour rather than regular wheat-based flour. This makes them light and fluffy as well. You pick the cheese depending on what flavor you like. The kids love cheddar, so that’s what I usually stick to, but I’ve made them with gruyere, mozzarella & parmesan, and a Mexican cheese blend. They’re all fantastic.

The bread comes out a cute little puff that’s a little crispy on the outside with a rich, chewy center. The texture is both light and satisfying, cheesy and bread-y (is that a word? It is now!). They’re the perfect Olympics-worthy snack food, especially for some serious Olympics watching. Just be careful, because it’s super easy to eat one after another after another until they’re gone. Oh, what the heck, go ahead – there’s nothing bad in them, so eat to your heart’s content! I bet even some of the Rio 2016 athletes would include these little morsels on their menus.


Okay, What’s In It?


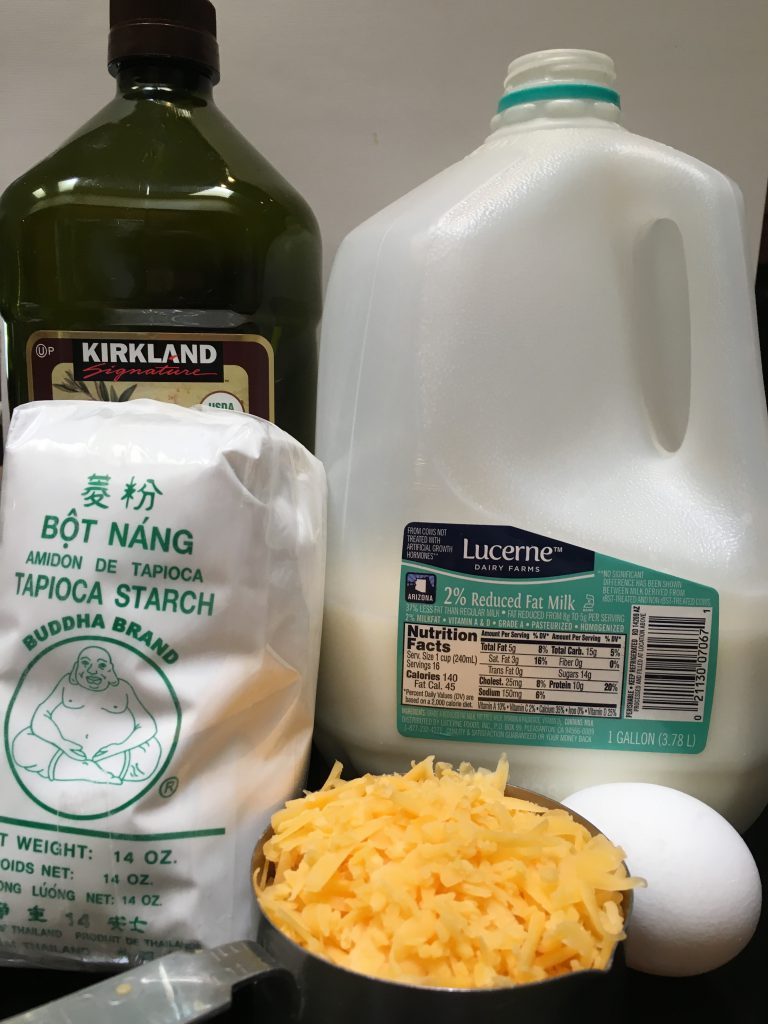
Cheese, olive oil, milk, egg, a little salt and tapioca flour. If you don’t have tapioca flour – also known as tapioca starch – in your pantry, no worries. It’s easy to find. Most grocery stores will have it in the same aisle with the regular flour. Just look for it with the other packages of “specialty” items like oat bran, almond flour, rice flour and the like. Bob’s Red Mill is a popular brand that most grocery chains carry now.


Brazilian Cheese bread ingredients

Tapioca Flour (starch) from the Chinese store along with the other ingredients


If you happen to have an Asian market nearby, go there for your tapioca flour. I usually buy several packages on my runs to the Chinese grocery store since I can score each package for around 89 cents.

If you’re dairy-free, I’m afraid I haven’t tried any substitutions with this recipe. This is one I follow to the letter with no alterations. Not because I don’t like to experiment, but because this recipe works. It’s just right. Every time. If you do try any substitutes, let me know. I’d love to hear how they work!


Are You Ready to Try These?

Okay, I won’t keep you waiting any longer. Here’s the recipe!


Print Recipe
Brazilian Cheese Bread for Rio 2016
A light, chewy, cheesy puff perfect for snacking. Gluten-free and delicious. Add these to your Rio 2016 Olympics watching menu or serve them anytime!
Olympics-worthy Brazilian Cheese Bread
Prep Time 10 minutes
Cook Time 20 minutes
Servings
mini puffs
Ingredients
Prep Time 10 minutes
Cook Time 20 minutes
Servings
mini puffs
Ingredients
Olympics-worthy Brazilian Cheese Bread
Instructions
  1. Preheat oven to 400 degrees F.
  2. Grease or spray mini muffin tin(s) - 1 large or 2 small.
  3. Put all ingredients into blender & blend until smooth, scraping down sides as necessary.
  4. Pour batter into muffin pans so each cup is nearly full.
  5. Bake 15-20 minutes or until puffed and lightly golden brown.
  6. Let cool in pans for a few minutes, then remove and serve.
  7. Enjoy!
Share this Recipe
Read More

Chicken Enchiladas (Plus Bonus Vegetarian Version)

Chicken Enchiladas

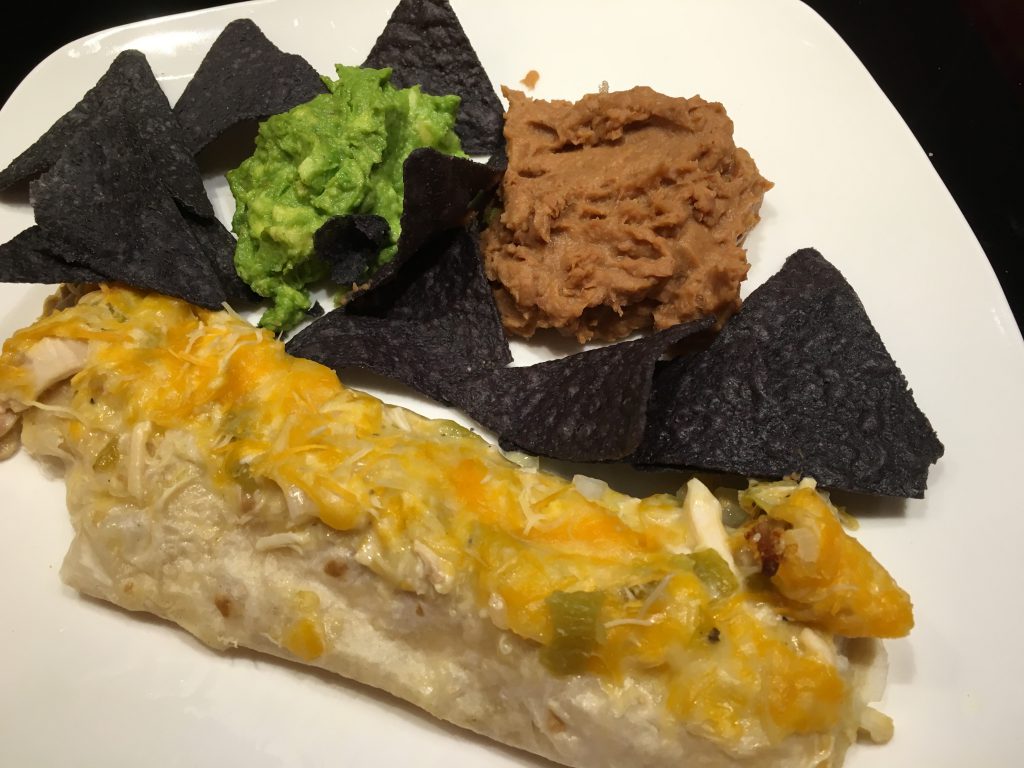
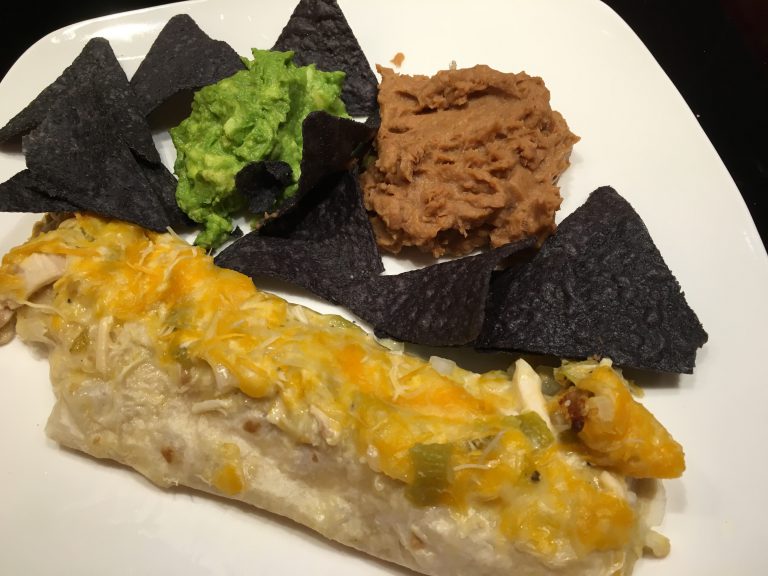
Chicken Enchiladas with beans and guacamole


On busy weeknights I need go-to recipes I can prepare in a flash. And in my household I also need the recipe to be flexible enough to accommodate our vegetarian teen as well.

These chicken enchiladas make a satisfying and comforting meal. A few weeks ago, my friend had a death in the family and was so busy taking care of family business, she didn’t have time to cook. I took her a pan of chicken enchiladas, along with some Mexican rice and beans to complete the meal. She texted me later to ask for the recipe, so I think they enjoyed it!

Given her request for the recipe and the fact that I made these last night, I thought it was time to put the recipe out there. For once, it’s a recipe of my own creation and not something I found on the internet. I’ve taken bits and pieces of other recipes and come up with something that works really well for my family. And with just a couple of substitutions, I can make a vegetarian version, too. Both the meaty and the veggie versions are delicious, filling and easy to make.

I love how versatile I can be with this recipe. For example, last night I didn’t have much time, so I ran to the store, bought pre-cooked chicken with the rest of my groceries, and threw the whole thing together when I got home. On more leisurely days, I’ll often buy chicken on sale, then cook and shred it myself. You could also use leftover rotisserie chicken. See how many options you have? I also had half a container of sour cream in the fridge, so I put that into the vegetarian version to give it a lovely tangy flavor.

As a base for the filling, I use cream of chicken soup and a little milk. On busy days, I use a can. Yes, I admit it. Sometimes the canned stuff is worth the time saved. If I have the time and energy, I make it myself with this super easy recipe from Mindfully Frugal Mom. Just leave out the mushrooms (or broccoli), and you have a lovely, easy cream of chicken in about 10 minutes.

If you like green chiles, like we do, they add a nice flavor to the enchilada filling without too much spice. My husband likes to roast these, himself, when we can get them fresh. But I love the convenience of the little cans of roasted green chiles. Plus, they’re just the right amount. If you don’t like green chiles, just leave them out!

As for the vegetarian version … spinach and mushrooms make a delicious combination. But this would work equally well with whatever vegetables you have on hand. Think zucchini, eggplant, kale, squash or anything else that will hold up in a tortilla. Broccoli and cauliflower would work, too. Just be creative, or use up the veggies in the fridge.

Okay, enough of the commentary. Here are the step by step instructions (with photos). The recipe follows at the end.


Chicken Enchilada Filling


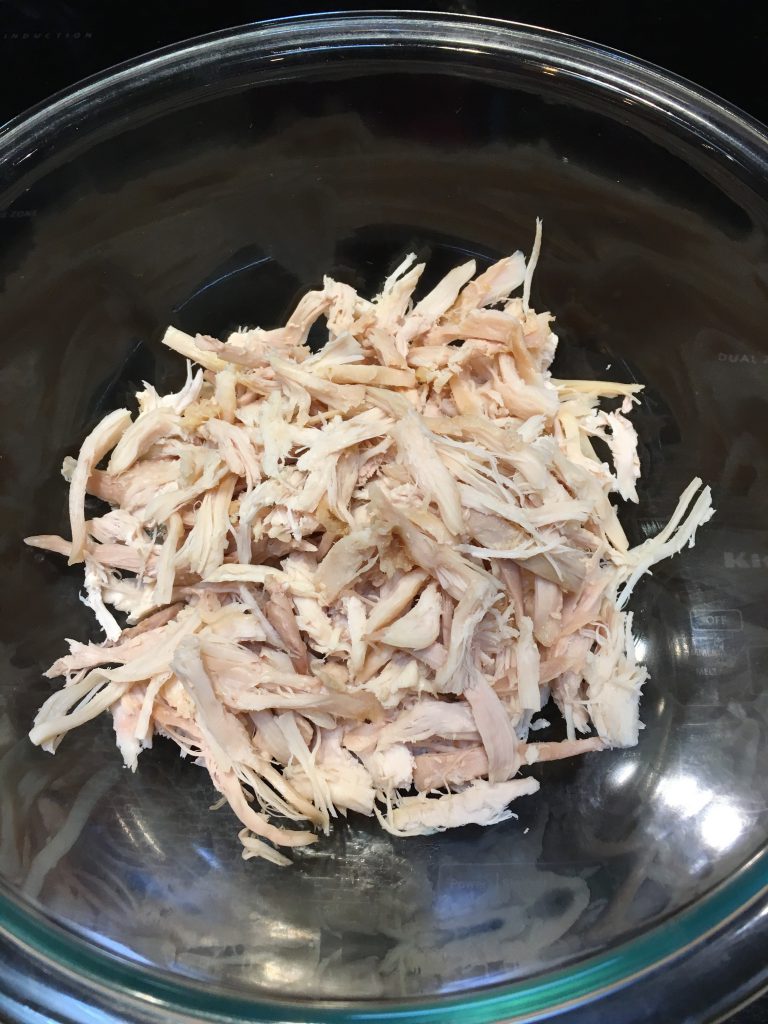
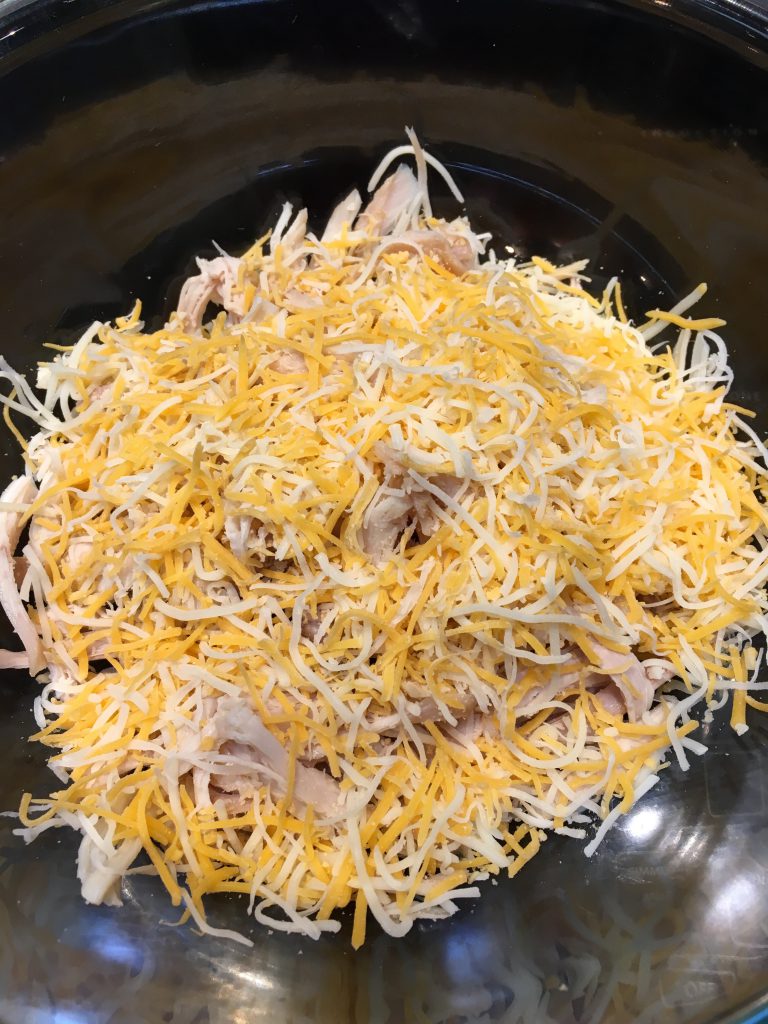
First, shred up a bunch of chicken and put it in a large bowl.

shredded chicken

Shredded chicken for enchilada filling


Then add some cheese – I use a Mexican blend but plain cheddar works, too.

IMG_3120


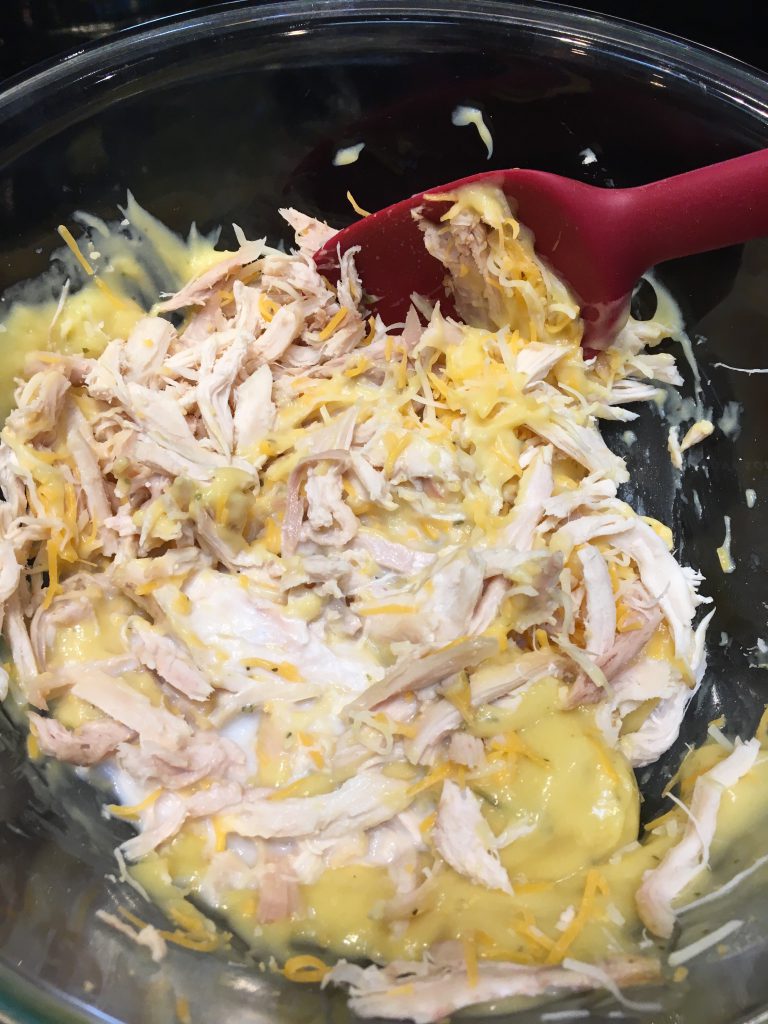
Add the cream of chicken soup (either one can or about 1 cup of homemade) and a little milk to moisten the whole mixture.

IMG_3121 (1)


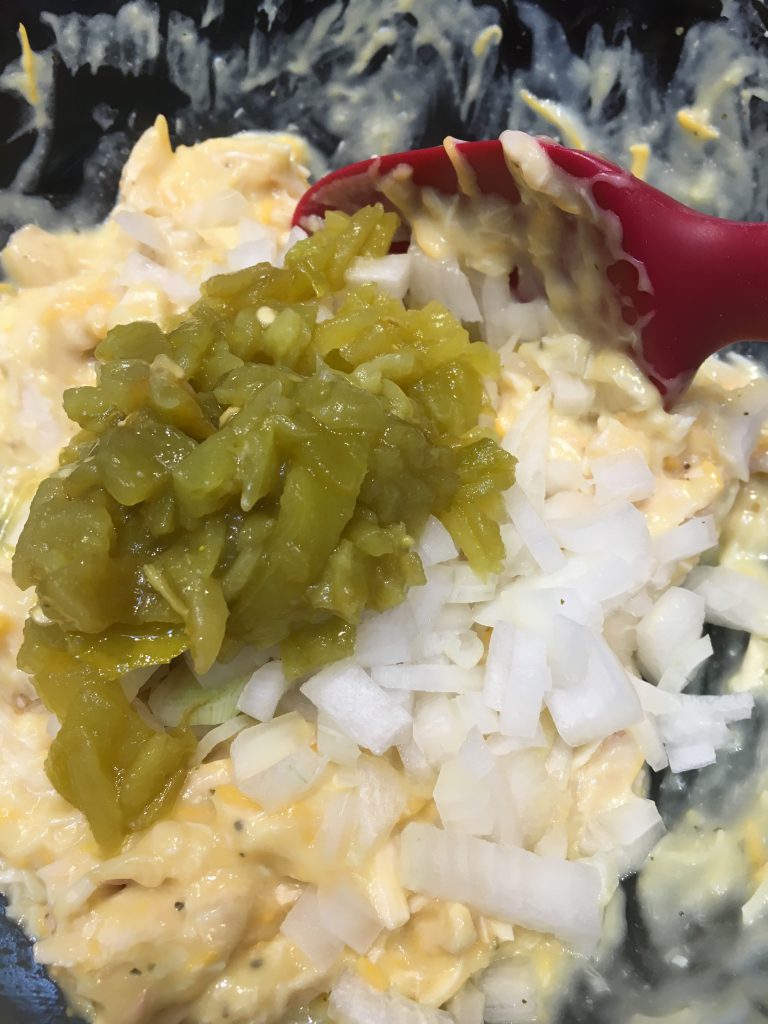
Throw in some chopped onions and green chiles and stir it all together.

IMG_3122 (1)

Your filling for the chicken enchiladas is done!


Vegetarian Enchilada Filling


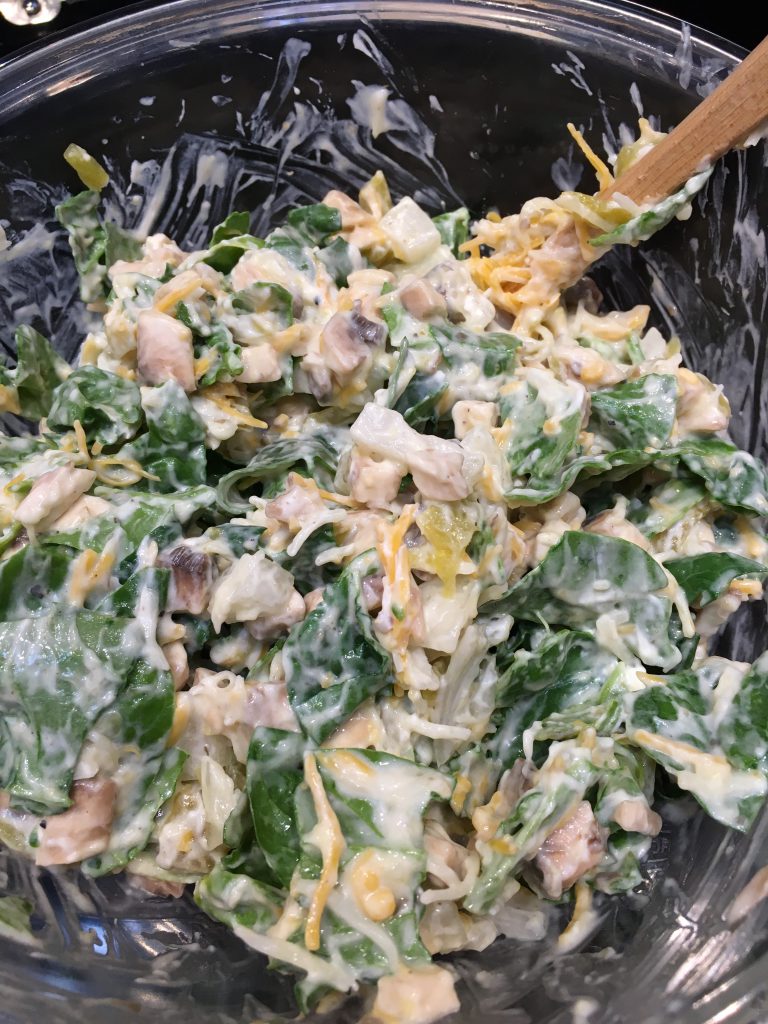
If you’re making the vegetarian version, substitute chopped spinach and mushrooms for the chicken, and sour cream for the soup. Add salt, pepper and any other seasonings you like (I like garlic powder). Mix that all up!

Vegetarian Enchilada Filling

Veggie Enchilada Filling


Roll, Bake and Enjoy


Now it’s time to roll. Lightly grease a 9×13 baking dish (or use a little cooking spray). Then, spread some filling across the bottom half of a tortilla and roll it up. Place it in the baking dish, seam down. I usually use about 1/2 cup of chicken filling per enchilada and about 3/4 cup of the veggie mixture. The vegetables will shrink a little while baking, so roll those up tight!

I squeezed them in pretty tight last night and 10 enchiladas fit in the pan (half chicken and half veggie). If you want to give them a little more room (or make bigger enchiladas), 8 is a comfortable number for most families. Cover them with any extra filling – I do this so I can tell which ones are which. Then sprinkle more cheese over the top and put them in the oven.

chicken and veggie enchiladas

My pan of chicken enchiladas & veggie enchiladas going in the oven!


Bake them at 350 degrees for 20-30 minutes, until the cheese on top melts and the edges just start to get crispy. When they’re done, let them cool for about 5 minutes, then serve them up.

I like to serve them with beans (refried or black) heated up with a little cheese – just save some from the enchiladas. And if avocados are on sale, I’ll whip up some simple guacamole – just mashed up avocados, garlic powder and salt. Of course, these would be great with a simple salad or sautéed vegetables as well. Oh, and a little rice wouldn’t hurt either. Add your favorite salsa and you’ll be humming with yummies!

Whatever you serve them with, I hope you enjoy! And let me know what you think!


Print Recipe
Chicken Enchiladas
An easy and versatile recipe to get a wholesome, delicious meal on the table on even the busiest nights. These chicken enchiladas are quick to throw together and can be adapted to satisfy vegetarians with little effort - even in the same pan!
Chicken Enchiladas
Prep Time 15 minutes
Cook Time 30 minutes
Servings
people
Ingredients
For Vegetarian Filling
Prep Time 15 minutes
Cook Time 30 minutes
Servings
people
Ingredients
For Vegetarian Filling
Chicken Enchiladas
Instructions
  1. Preheat oven to 350 degrees and prepare a 9x13 baking dish by greasing or spraying lightly.
  2. In a large bowl, combine shredded chicken, 3/4 cup cheese, cream of chicken soup, milk, onion and green chiles. Mix well. * Use pre-cooked chicken or take 1 lb chicken, boil for 20 min. until cooked through. Cool then shred. Can be done in advance.
  3. Place approximately 1/2 cup of the filling across the bottom of a tortilla and roll securely. Place in baking dish, seam side down. Repeat until pan is full. Don't worry if there's a little leftover filling.
  4. Spread remaining filling over the top of the rolled enchiladas in the pan.
  5. Sprinkle remaining cheese evenly over the top. (Reserve a handful of cheese to warm in your beans if desired.)
  6. Bake for 20-30 minutes or until cheese on top is melted and edges begin to brown.
  7. Remove from oven & let rest for 5 minutes.
  8. Serve and enjoy!
For Vegetarian Enchiladas
  1. Substitute spinach & mushrooms for the chicken.
  2. Substitute sour cream, salt & pepper for the cream of chicken soup. Add any additional seasonings as desired (garlic, herbs, etc.).
  3. Mix and roll and bake as for Chicken Enchiladas, but use a little more filling since the vegetables will shrink while cooking.
Recipe Notes

Ingredients as listed will make a full pan of enchiladas - either chicken or vegetarian. If you would like to combine both versions into one pan, just use half the chicken and half the vegetables. Split the rest of the ingredients into two bowls, prepare as usual and bake them together. Spreading the leftover filling on top will help you identify which ones contain chicken and which ones contain the veggie version.

Share this Recipe
Read More

Amazon Prime Day: Don’t Miss Out!


Amazon Prime logo

Amazon Prime: Why I Can’t Live Without It

I love Amazon Prime. There, I said it.

I love Amazon Prime because it saves me time, money and stress. As a busy mom, I can’t tell you how many times I’ve been saved by Amazon Prime. I know some people cringe at the thought of Amazon, about the monster company taking over. I love small businesses and local merchants. But when I find myself scrambling because that birthday party is this weekend, Amazon Prime saves me. Every. Time.

And if you join now, you’ll be able to take advantage of Prime Day tomorrow! All day on Tuesday, July 12, there will be special offers just for Prime members (yes, free trial members count!). I’ve been checking out the previews of the deals that will be available tomorrow, and they’re fabulous. Designed to save you a ton of money, the 100,000+ special Prime Day offers really do rival even the best Black Friday deals. But you can only access them if you’re a member.

If you’re not an Amazon Prime member, here’s your chance to join now for FREE and explore the benefits it offers. Just click the button below to start your free trial, and keep reading for all the reasons I think you’ll love it.


In the spirit of full disclosure: This post contains affiliate links. This means I may earn a commission (at no extra cost to you) if you accept an offer in one of my links. This helps cover the expense of running my blog while keeping the content 100% free. I only recommend products I believe in, so you can trust that if I’m writing about it, it’s something I would buy, myself. Your support is appreciated!

FREE Shipping = Totally Worth It


The main reason I love it? FREE 2-day shipping! For some reason, getting shipping for free feels like the ultimate deal. I know it costs money to send packages; I know it’s only fair that the consumer pick up that cost. But for me, free shipping often makes or breaks my decision to buy something, especially if I buy it regularly. Over time, shipping on the repeat purchases I make – like the sunblocks I can only find on Amazon – would cost a fortune!

So every year, my Amazon Prime membership quietly renews itself for $99, and I don’t worry about shipping for another 12 months. And I can happily buy my sunblock and expensive “dermatologist-recommended-because-I’m-getting-older” moisturizer along with birthday presents, craft supplies and so many other things. I choose what I need, check to see if it qualifies for Amazon Prime free shipping (most do), and click the button. Done!

Even better? Many of the Amazon Prime-eligible products occasionally come with free ONE-day shipping. And in some amazing cases, you can even get delivery in a couple of hours. For busy moms who juggle multiple schedules, responsibilities and activities, what could be easier?


Books, TV Shows & Movies


I recently discovered that Amazon Prime members have access to a great selection of e-books, TV shows and movies – all for FREE.

If you have a Kindle – or the free Kindle app on your phone or tablet – you get access to a free book every month. A panel of editors picks six books each month to promote, and Amazon Prime members can choose one for free. I just downloaded my first free book in June, and I really enjoyed it.

Amazon.com – Read eBooks using the FREE Kindle Reading App on Most Devices

I was heading out on a trip with my son, and I didn’t have room in my suitcase for an actual book, but I knew I wanted to read on the plane. I happened to remember an email from Amazon about free books for Prime members, so I followed the link, read the reviews, picked one and downloaded. While it wasn’t a literary masterpiece, it kept me busy and happily entertained throughout the trip. I will definitely be doing this again.

I also love that I can stream free shows and movies with my Prime membership. I recently decided to start watching The Americans again, but I had to catch up on last season. It’s not on Netflix, and my On Demand service only has the current season. Luckily, Amazon has it, and previous seasons of the show all stream for free. A few nights of binge watching, and I was all caught up!


Music to My Ears


Amazon Prime Music offers a huge selection of streaming music free of ads, and it’s included in your Prime membership. Just like Spotify or Pandora, you can curate your own playlists or stream personalized stations of music you like. I use this at the gym, and once I start running again (*ahem* *cough, cough* when it gets cooler), I’ll create some awesome playlists to keep me motivated.

The Prime Music library has amazing stuff available to stream for free, like the soundtracks to Hamilton and Book of Mormon and full albums from your favorite artists. Also, thousands of songs from artists, old and new, can be streamed or purchased at your fingertips.

There are a ton of features I have yet to figure out, like streaming Prime Music to multiple devices. You can add up to four devices to your account, which is great since the kids are becoming more independent in their music choices as they get older.

Click below to discover all the fabulous features of Prime Music.


Still More Amazon Prime Benefits


Amazon Prime offers so many benefits that I have yet to try them all, but here are a few that look amazing.


Audio Books with Audible


Amazon’s company, Audible, has a huge selection of audiobooks and other spoken word programs. With special features like the ability to read a book on my Kindle app, then switch to listening to it in the car, this service looks intriguing to me. Like so many moms, I spend a lot of time in the car, and listening to books helps make the time in traffic a little easier to bear.

Amazon Prime members can get a free trial of Audible, including 2 free audiobook downloads. Once the trial period is over, it looks like the subscription costs $14.95 a month for one book per month. I may not use it enough to justify the price, but if you’re interested, click the link to start your free trial.


Unlimited Photo Storage


Who could use a secure place to store your photos? With access to cameras on our phones making it super easy to snap tons of pictures all the time, it can be easy to run out of space quickly. Amazon Prime members have free access to Amazon Drive and can upload an store photos securely.

You can access your pictures from your phone, computer or tablet from anywhere. And last year, when the service was still new, Lifehacker gave it an honorable mention in its Five Best Image Hosting Web Sites post. I’m sure some of the rough edges have been smoothed out since then, and this looks like an awesome option for free photo storage.


Amazon Student


As a former higher education professional, I still find myself on the lookout for great deals for educators and students. Amazon Student fits the bill. If you’re a student, you can get all the benefits of Amazon Prime at half the cost. This includes the free 2-day shipping, Prime Music, Streaming Video, photo storage and all the other great features. You’ll also get special offers just for students.

Some of the features get activated after the free 6-month trial period, but for 6 months, you can test it out. Take advantage of the free shipping, just in time for buying your textbooks and school supplies. Then, if you like it, you’ll only pay 50% of the regular Prime membership. Check it out below.


One Last Great Option


If I haven’t given you enough reasons to hop on the Amazon Prime wagon, let me give you one more. You can share your membership with others in your family!

Yes, with your membership, you can include another adult on your account. This gives them access to the free shipping, streaming video and all the other benefits of Prime. Both adults can then manage and share Amazon Household features to allow the kids to access games, books and apps on their devices. This means that you don’t have to do it all! Your spouse, mom, or another adult can also do the shopping and manage what the kids watch and play. All on one membership.

This saves me a ton of time. I used to get little notes all the time from my husband asking me to order this or that, so we could get the free shipping. Now he can just order what he wants, himself, and I don’t have to stop what I’m doing to click for him. It seems so small, but anything that can save a few minutes is worth it!


Remember Prime Day Tomorrow!


Okay, just one more reminder that Amazon Prime Day is happening tomorrow, July 12. Thousands of deals just for Prime members. If you’re not already a member, click on any of the links above to start your free trial membership. You can always cancel later if it’s not for you.

If you already have a Prime membership, then thank you for reading this far! You already know the value and benefits of Prime. But did you know you can give a Prime membership as a gift? I didn’t. If you know someone who could benefit from Prime membership and want to give them a gift that keeps on giving, here you go! This could be especially useful for new moms who can take advantage of Amazon Mom’s 20% of diapers and 15% off baby registry items.

Do you know any new homeowners or young adults who might be cash-strapped right now, but who have lots of shopping to do? Recent college grads starting out on their own, newlyweds, someone moving to start a new job? The list of great candidates for a gift of Prime goes on and on.

Click here if you’d like to gift Amazon Prime as a gift.


Thanks to Amazon for offering a program as great as Amazon Prime. And for providing bloggers like me the opportunity to earn a little cash by promoting something I already love. I started my membership when my youngest kid was in diapers to take advantage of the Amazon Mom benefits. This was long before I started to blog, so this truly reflects a service I can recommend from the heart.

I save more than the membership fee each year on shipping costs alone. So I can honestly say that this program offers great value for the money.

If you appreciate value, convenience and access to a ton of great products, join me as an Amazon Prime member.


Read More

Tragedy, Heartache and Opportunity

15478583718_31203b17a4_k

Photo credit: Luke Detwiler on Flickr


Dear readers,


I’ve been trying to write for the past two days, and I can’t seem to get it done. Given the tragedy of the past few days – the senseless deaths of Alton Sterling in Baton Rouge (LA), Philando Castile in Falcon Heights (MN) and five Dallas police officers – posting a light story and a pasta recipe didn’t seem right.

This has been a trying week, and it seems like the heartache and tragedy have no end in sight. It makes me wonder what has gone so wrong that we have a hashtag honoring new victims of violence almost daily.

To top it off, my son and I had an encounter with a man in the parking lot at summer camp drop-off on Friday morning. This man, who I assume is the dad of another of the campers, felt it was necessary to jump out of his car and verbally attack my child for *almost* tapping his car with our car door. My son, who can usually let things roll off his back pretty easily, felt shaken and upset when, only moments before, he was so excited about being at camp.


It Made Me Wonder


When did it become okay for an adult to value his car’s paint job over a child’s worth and energy and sense of self? When did being stopped by the police mean being shot to death in front of a 4-year-old? And when did a peaceful protest become an opportunity for a disturbed individual to violently gun down police officers? Have we become so wrapped up in ourselves that we fail to understand the concept of love and kindness and compassion toward our fellow human beings?

My heart aches for the families and loved ones of those we lost this week. I can’t imagine what they must be feeling. But I know that their losses cannot be in vain. We all have a responsibility to do something to make things better.

If we truly want to turn this around, we need to take a step back and look at what has brought us to this place. I’ve been reading a lot of other people’s thoughts on these recent events. So many have eloquently expressed their outrage and heartbreak far better that I ever could. So rather than try to make sense of this tragic week myself, I thought I would share some wise words from wise people.


Voices of Tragedy


Whether 2 of you reading this or 200, I hope you’ll take some time to explore some of these resources. They’ve helped me sort through my feelings and try to make sense of the senseless. I hope they can do the same for you.

Cool Mom Picks provided a wonderful compilation of links in response to the killings of Alton Sterling and Philando Castile. Keep in mind, this came out before the Dallas shootings, so resources related to violence against police are not included.

To help explain the bias that Black people in America feel every day, read this. Thomas sheds light on the reality of the Black Tax and how weary our African American brothers and sisters have become. In contrast, one of my favorite bloggers, Jill from Ripped Jeans and Bifocals, writes about understanding White Privilege and how critical that has become.

This Baton Rouge mom explains why Alton Sterling’s death has changed how she talks with her White sons. It breaks my heart and gives me hope at the same time.

Of course, any number of news outlets can provide you with detailed accounts of what has happened and how things continue to unfold. And if you’re looking for something to do, @joshuadubois offers this option – a simple letter you can write to your local police chief. Adapt it as needed to reflect your own questions, concerns and feelings.


Out of Tragedy Comes Opportunity


If you feel, like I do, that these events present an opportunity, I encourage you to do something. Do something to support your African American friends and neighbors. (Hint: start by educating yourself on what Black Lives Matter really means. Read this simple analogy to help you understand.) Do something to appreciate the difficult and sometimes dangerous work our police officers do to protect us.

Write a letter, talk to a friend, try to make a difference. But please don’t answer violence with more violence. Don’t respond to hate with more hate. We all need to do our part to stop that cycle and fix our broken communities.

On that note, I’ll leave you, again, with wiser words than mine. Dr. Martin Luther King, Jr., one of our most eloquent leaders put it beautifully …

The ultimate tragedy is not the oppression and cruelty by the bad people but the silence over that by the good people.

Please don’t be silent any more. Don’t let the bad people win. Let love win and peace prevail. Please.

What will you do to end the cycle of hate and violence? Leave your actions, ideas and comments below.


Read More

Sunblock: 4 Choices You Won’t Hate

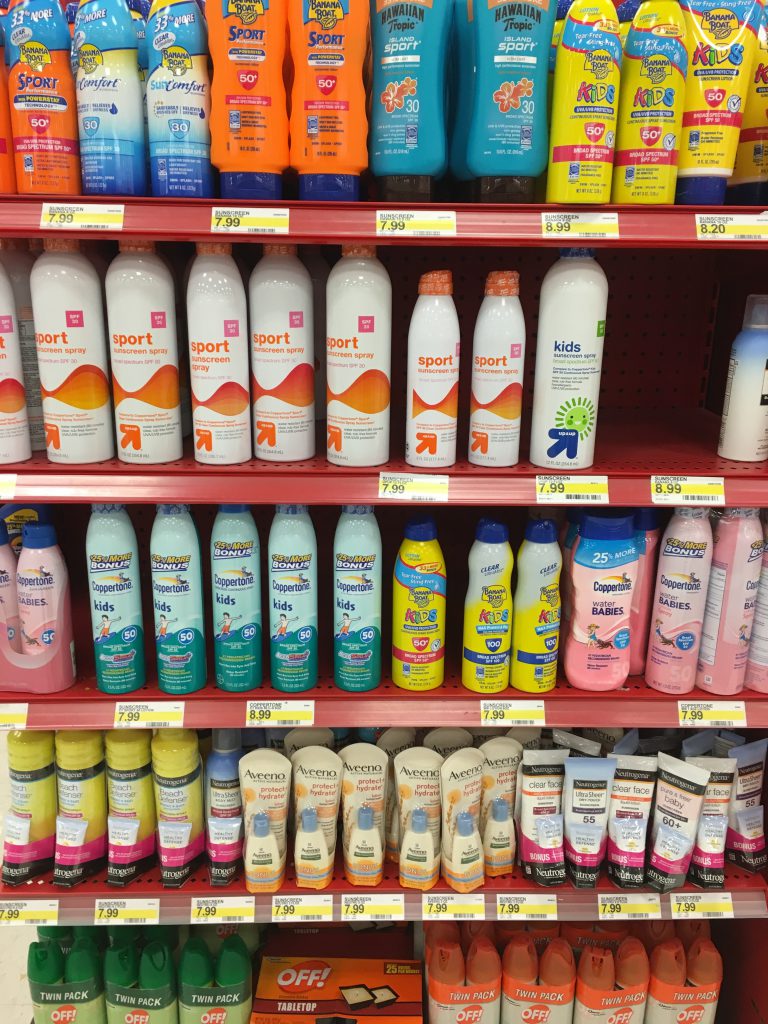
Sunblock display

Sunblock galore! How do you know which one to choose?


Summer arrived with a vengeance here in Arizona. Now, in the second half of the summer, there seems to be no relief from the blazing sun. With temperatures well over 100 degrees, the only place the kids want to be is in the pool. But with the brutal temps and the sun so intense that it’s possible to get sunburn walking to your mailbox, we have to be especially careful to be sun-smart and do what we must to protect ourselves.

That means protective clothing and sunblock. Lots of sunblock. Now, I’m not an expert, but after living in Arizona for more than 20 years, I’ve been through lots of trial and error with different sunblocks. I still have a love-hate relationship with SPF-laden substances, but I would rather be safe than sorry, so I use it.


Why I Hate Sunblock and Why You Might, Too


It Doesn’t Feel Good

For me, putting on sunblock has always felt like wrapping myself in plastic and pretending to be comfortable. My skin can’t breathe and I feel as if my very pores are suffocating. I break out in a sheen of perspiration right after I put it on, sweating away any protection minutes after applying it. Perhaps my body chemistry just isn’t suited to most standard sunblocks or perhaps it’s all in my head. For years, I’ve tried to convince myself it was just a psychological thing. Alas, I would go ahead and slather on the uncomfortable, sweaty, saran wrap sunblock.

Then there are the kids. Many of the products out there for children are sticky or pasty, spackle-like substances that are almost impossible to put on a squirmy kid. Or perhaps your kids are like mine and become rag dolls at the sight of sunblock. Those thick creams are really hard to spread on arms that are like limp noodles. They also tend to be white or greasy and most kids hate having to put it on.


It’s Full of Strange Ingredients

Most sunblocks list a long array of active ingredients that may or may not cause more harm than they prevent, and those really high SPFs (50 and above) that come with added chemicals don’t really protect you any better than the SPF 30s do. Things like oxybenzone, which is used in 70% of sunscreens, is a known hormone disrupter and allergen. And additives like Vitamin A, intended to help slow skin aging, have actually been found to speed up the development of skin tumors and lesions. Yikes! (Vitamin A can be identified as retinol, retinyl palmitate & other retinoids with similar names.)


It’s Expensive!

Seriously, who wants to spend up to $20-$25 on a tube of sunblock that doesn’t work for you? I don’t mind paying for a quality product, but I want to know it works. And that it’s safe. And that it won’t sit on my shelf unused because my kids refuse to use it. Sometimes, you just don’t know if it’s right until after you’ve spent the money.

Given these concerns, buying the right sunblock can be a daunting task. From obsessively researching ingredients and reading labels to making sure it’s easy to apply and comfortable to wear, it’s almost enough to make you throw your hands in the air then go to a dark corner and curl up into a ball until winter. But fear not, brave mamas! Read on for some great choices in sun protection that won’t make you crazy.


Sunblock You Won’t Hate


Personal Preference AND Expert Opinions

All of my sunblock recommendations come from years of actual use on myself and my family, including 3 kids and a husband with the extra challenge of thinning hair. These products work really well for us, and all have been held up to the scrutiny of the Environmental Working Group (EWG) Sunscreen Guide.

If you’re not familiar with the EWG, they are a non-profit, non-partisan group dedicated to protecting human health and the environment. And they do a great job of evaluating products for potential health and environmental dangers. Their website includes a score (the lower the better) for each product and explains exactly how they came to that score. Armed with this information, you, the consumer, can make informed decisions about which products suit you and your family best. Feel free to visit their site yourself, but if you feel like you don’t want to do the research, I’ve included their information in each of my recommendations.


Physical vs. Chemical Sunblocks

Basically, sun protection products come in two different categories. Physical blockers contain mineral ingredients that sit on top of the skin and provide a physical barrier to UVA and UVB rays. The common active ingredients in this category are zinc oxide and titanium dioxide. Chemical blockers contain ingredients that absorb into your skin and react with your body chemistry to provide a barrier to sun damage.

The EWG tells us that physical blockers present a lower risk to our health and environment because they are naturally derived (minerals that are already present in the environment) and they do not penetrate into our bodies. On the other hand, chemical blockers, while extremely effective in protecting us from sun damage, DO penetrate through our skin and may have negative health impacts. These may include hormone disruption, development of allergies, and presence in mother’s milk. They also wash off into our oceans, lakes, rivers and local water supplies every time we swim or shower, so it’s important to understand which chemicals are the safest and which have the least impact on our environment.

The seemingly simple task of choosing effective sun protection brings up so many considerations for all you thoughtful consumers. So, let me break it down to some great products for you.


Drum Roll Please … 4 Awesome Sunblock Recommendations


(Affiliate links included for eligible products. This means I may get some compensation if you choose to purchase a product through these links.)


1.KINeSYS Performance Sunscreen Spray, SPF 30 (EWG rating=4)


This unassuming little bottle has become my g0-to favorite sunblock for the family. It IS a chemical sunblock, so if that’s a concern for you, this may not be the best choice for you. But even though I try to avoid the chemicals, I find this one to be a great choice, especially for me and our oldest son. We both have that feels-like-I’m-wrapped-in-plastic syndrome with sunblock. This one allows my skin to breathe and it feels like I’m not wearing sunblock at all.

The EWG rates it a 4, which means it’s a moderate concern for health & environmental factors. Part of the concern is inhalation risk, which will lower the rating for any sunblock that comes in a spray. I’m willing to take that risk for the convenience, comfort and ease of application that the spray provides. I just spray it into my hands then rub it on to minimize the inhalation risk. For my husband, he sprays this directly on his bald spot without worrying about making a sticky, gooey mess in his hair.

This feels a little oily going on, but – surprise – it doesn’t contain any oil. So if you can get past the first few minutes, you won’t feel it on your skin at all once it’s dry. It’s wonderfully light and breathable, it doesn’t leave any residue on your skin, and it’s incredibly long-lasting and effective.

I feel comfortable using this for many outdoor activities, including swimming, exercise or just being outside. It hasn’t bothered my sensitive skin, and it won’t dry your skin like so many other products.

Pros: Easy to apply, feels great, non-greasy, breathable, long-lasting, good protection

Cons: Chemical sunblock, moderate health risk, feels oily going on


2. Mineral Fusion Brush-On Sun Defense, SPF 30 (EWG rating=no rating this year)


My kid’s favorite sunblock comes in this handy brush-on format. While the EWG does not have a rating on this particular product, other sun products from Mineral Fusion rate a 1-2. This means the ingredients they use pose minimal risk to human health or the environment. As its name indicates, this physical blocker uses minerals to protect you against the sun’s damaging rays. Its easy-to-apply formula gets no complaints from my little guy, who’s been using this since he started pre-school at age 3.

It takes only seconds to put this sunblock on, and while inhalation is a risk, you can play a little game in those seconds. See if your kid can hold his breath while you brush it on his face. If you have girls in your life, it’s just like putting on make-up, and they love it! This goes on my son every day before school, and it provides all day protection from our intense Arizona sun.

This powder sunblock works great for a day at the playground or out at the zoo. It does “stick” to the skin without feeling sticky, so you know it’s there. I’ve used it on myself in a pinch if I find myself outside unexpectedly. It’s small enough to tuck into your purse, so you can have it with you wherever you go. I haven’t felt confident enough to use it for the kind of swimming my kids do, but you can use it in the water just as you would any other sunblock. If you try it in the water, let me know how it works!

Pros: Easy to apply, kids don’t complain about putting it on, full coverage in seconds, light and as easy to wear as powder make-up

Cons: Inhalation risk (hold your breath!), doesn’t always go on evenly, so you may have some cakey spots to rub in

Bonus: Being frugal, I love that I can refill this applicator. Unfortunately, I haven’t been able to find a refill package of the Mineral Fusion Brush-On sunblock. So, I’ve started buying the Brush on Block refill and putting it into my Mineral Fusion applicator. It works great and saves me a little money in the long run!


3. Goddess Garden Kids Natural Sunscreen (EWG ratings=1-3)


Really, any of the Goddess Garden products rank high, but this one lives in my kids’ backpacks for a simple reason. It’s super easy for them to put on by themselves. The sport spray comes out of the can sort of like a thin stream of silly string. My son thinks this is super fun, so he makes designs with it then rubs it in. The smooth, creamy formula feels substantial but not heavy. And it definitely does NOT resemble paste or spackle. The lotion from the tube comes out a bit thicker, but it’s still easy to rub in.

On days when my kids need to put on their sunblock themselves (i.e., at summer camp or on school swim days), Goddess Garden beats all others for being easy for them to apply with no mess. AND it’s safe for their bodies and the environment. While other sprays might be slightly easier, especially on hard-to-reach backs, they don’t come close in terms of safety.

While Goddess Garden has different “formulas” from Kids to Sport to Adult versions, the company offers this description

The ingredients are exactly the same on our Kids and Adult sunscreen. We’ve found that kids are more likely to use something “just for them”, so we made packaging reflect that.

The sport version does offer additional water resistance. So if you’re going to be sweating a lot or in the water, you might want to consider this product over the everyday. Otherwise, there’s virtually no difference.

Pros: Super safe ingredients, easy to apply, long lasting, great protection

Cons: A little goopy, minimal inhalation risk with the spray-on kind


4. Badger Sunscreens (EWG ratings=1-2)


With EWG ratings of 1 on almost all their products, Badger sunblock ranks as one of my overall best buys. With formulations from Baby to Sport to Everyday, Badger covers the full range of needs for your family. And their face stick provides great protection without stinging your eyes if you sweat or spend a lot of time in the water.

Badger went everywhere with me when my kids were little, and they never burned, even on the longest beach days. If you’re there to rub it in, these are fabulous. But because they’re a little thicker than others, it’s a little harder to get them on consistently, especially on small bodies.

Pros: Super safe, lots of choices, excellent face stick, feels good once it’s absorbed

Cons: Harder to apply the thicker formulas, can feel heavy or sticky to some


So, there you have it. My personally-tested, no-fuss, no-hate guide to sunblock. I know how hard it can be to find products with that magic combination of safety and effectively. All these sunblocks also give you great bang for your buck, so I don’t mind paying a little more than your what you’ll find at your average drugstore.

I hope this guide helps make choosing the right sunblock a little easier. Let me know if you try any of these. I’d love to know what you think!


Read More
Last Minute Father’s Day Gift

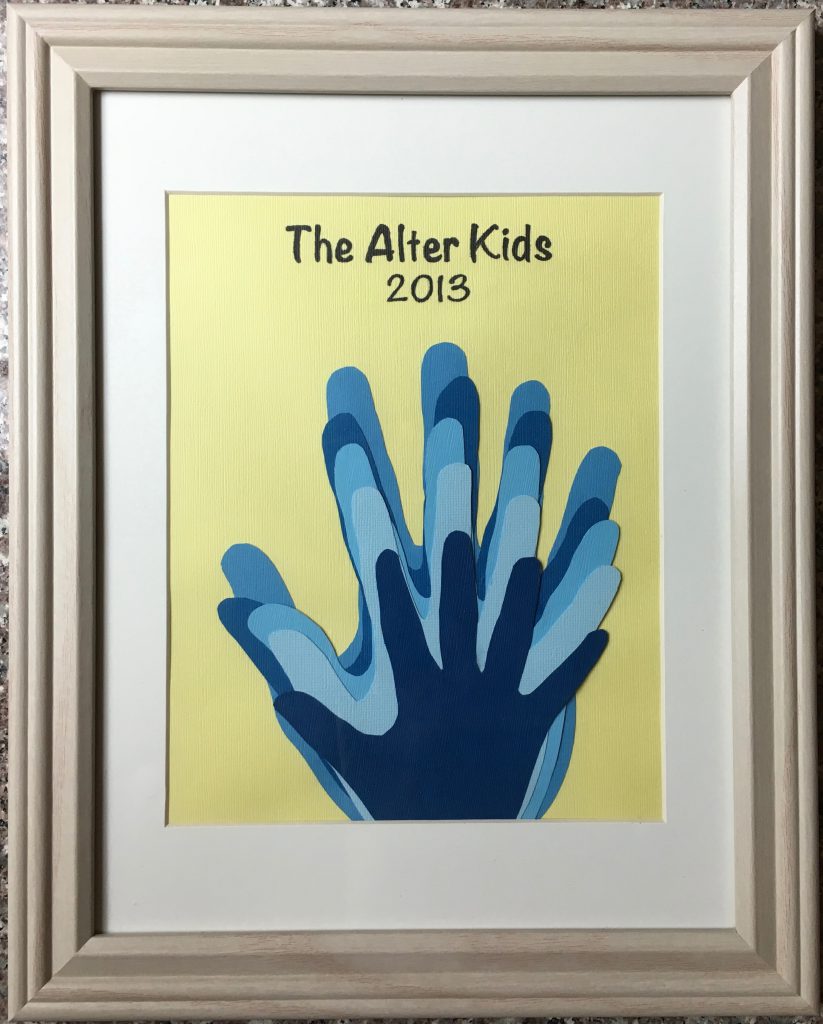
Easy Last Minute Father's Day Gift

Easy Last Minute Father’s Day Gift


This Sunday, those of us in the U.S. celebrate our dads. Are you ready? Or have you been so busy keeping your kids occupied or running them to and from camp that now you have to look for a last minute Father’s Day gift?

Fear not, I’ve got a super simple craft that you can do even if you aren’t crafty. If you can trace, cut and glue, you’ve got this! And like the other Father’s Day craft I posted on this blog, it’s a fabulous, personalized, custom piece that won’t cost a fortune.

My friend, Michelle, made one of these, and I love it so much that I “borrowed” the idea for Father’s day a few years ago. I made two of these for the grandfathers, and they love them. Two complete projects took a little bit of shopping time and about 45 minutes of actual assembly time. If you only make one, it will go even faster.

Since it was for the grandpas, I included my hand and my husband’s hand, because we’re they’re kids, too. Michelle’s represents her whole family, so she included her and her husband’s hands. But do what works for you. You can certainly just include your kids, or gather your siblings if you’re making it for your dad.


Gather Your Supplies

Here’s what you’ll need:

  • A frame with an 8×10 opening. I recommend getting one with a mat included, so your frame will likely be 11×14 like this one here (affiliate link). (Bonus: if you’re an Amazon Prime member, you’ll get free one-day shipping to get it here before Father’s Day!)

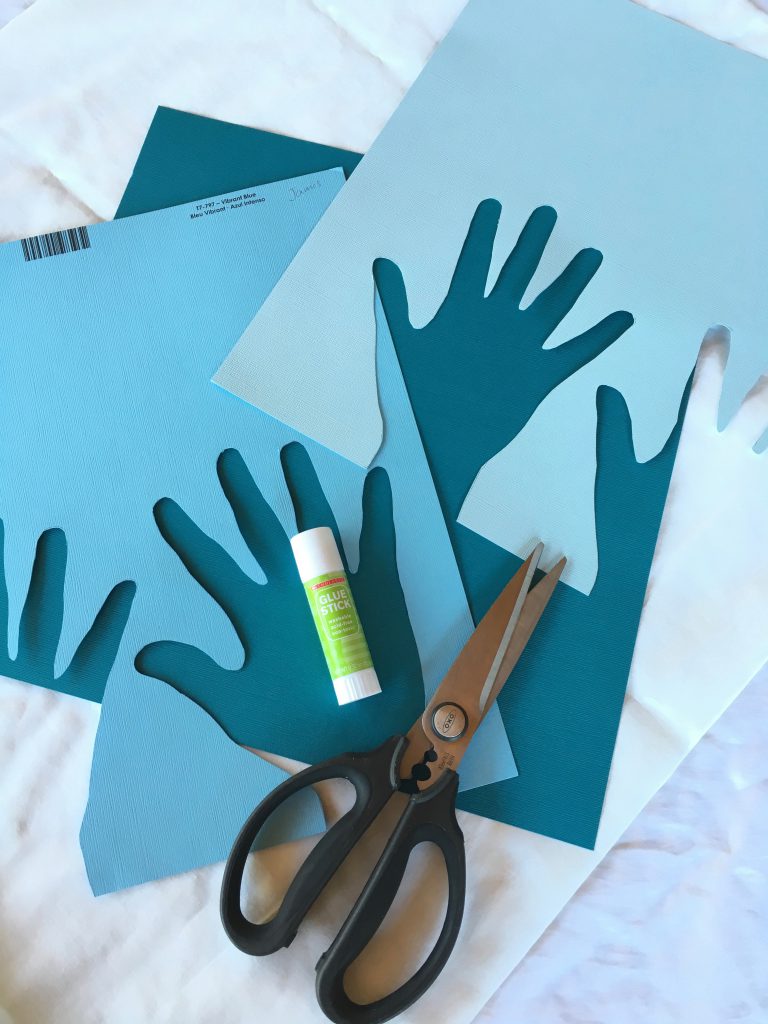
  • Several coordinating sheets of colored paper (I used scrapbook paper) – one for each person + one for the background. Check these out (affiliate link), and again, Amazon Prime!

  • Scissors, glue & a permanent marker.


Last minute Father's Day supplies

Just a few simple steps, and you’ve got a fantastic last minute Father’s Day gift


Here’s How You Do It

  • Pick a hand, and trace each person’s on a different color sheet of paper.
  • Cut out each hand.
  • Lay them out, stacked largest to smallest, on your background sheet using the mat as a guide.
  • Once you like it, glue everything down.
  • Hand letter whatever message you like at the top. You could say “Happy Father’s Day,” “The {Your Last Name} Family,” or whatever you like. I always add the date, too, so you can see how much the kids grow over the years. If you’re worried about hand lettering, you can make your message look professional using your printer, a pencil, and a simple transfer technique. Here’s how you do it (excuse the little bird chirping in the background; he wanted to be in the video!):
  • Once you’re done, erase any stray pencil marks and place your project in the frame, wrap it up and wait for the smiles. They’re going to love it!

For very little time and money, you can make this simple project that looks as polished and professional as the most expensive custom keepsakes.

What do you think? Is this something you would make for your family? I’d love to hear your thoughts and comments!

Read More